Jump to:
Bringing music to your garden is easier than you might think, and a shed can be the perfect environment for it. But to play or record music solo, jam with your band, or do your choir practice without getting complaints from neighbours, you’ll need to amp it up.
This guide will help you do just that, along with a few tips for putting together your new outdoor retreat!
Choosing a Garden Music Shed
To practice music, either on your own or in a group, you need a room that has the following:
- Enough space for all your instruments, people and accessories
- Not so cramped that the noise is deafening
- Windows, or the means to fit lighting
- A floor that can take the weight of any large instruments
Among sheds, you’ll definitely want to be looking at wooden sheds. Wood is more insulated, comfortable to inhabit, and easier to decorate than metal or plastic sheds.
You could consider an option like the BillyOh Expert Apex Workshop, which comes in small, medium and large sizes.
If a music garage is what you had in mind, the good news is that we have a wooden garage that is perfectly up to the task:
We’ve all seen music videos where people rock out in the garage, right?
Of course, if you want to make things a little more comfortable, you might want to consider something more akin to a garden room rather than a shed or garage. And you might be surprised to learn that it can increase the sound quality.

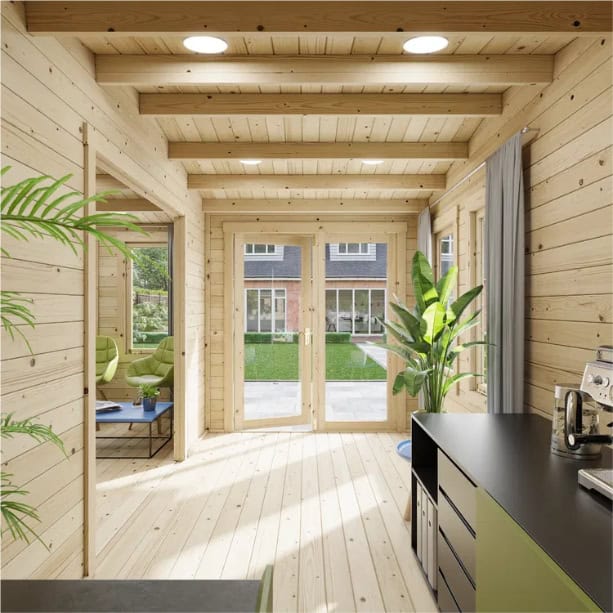
Practising on your own? Maybe recording a few tracks? You won’t need much room—something like our BillyOh Kent in 13×10 can provide you with just that. Though it’s designed for garden office use, its versatile layout also makes it ideal for music sheds.
The extensive interior features a partition wall, turning it into a multi-room space. That means you can set up one side as your main practice or recording area. You could have your cello, piano or brass set up there and ready to go.
Meanwhile, the other room is where you can keep your digital setup. Maybe add a small desk for mixing or editing tracks. And if you’re using it for recording, the partition makes a handy divide between your live room and control area.
You’ll want something bigger if you’re getting a group together—say a band or some mates for rehearsals. The largest available for Kent is 18x16ft, but if you really need a massive space, we recommend our Fraya Max.
The BillyOh Fraya Max has a long, spacious design with no partition wall. At around 26ft by 13ft, it gives you an open space to set up exactly how you like. The best part is there’s room for a full band setup, or you can split it into zones.
It’s a flexible layout that works whether you’re recording or rehearsing with others.
Soundproof Your Garden Room

The great thing about garden log cabins is that the walls are already pretty thick, so they do a good job of blocking noise from outside and stopping your music from disturbing the neighbours. However, the soundproof qualities can be upgraded further with some wall padding.
What if you’ve got a shed with thin walls? You can still make it work by adding soundproofing materials to the floor, walls, and ceiling.
For instance, you could use 30mm of Rockwool and 5mm of isolated rubber for the floors. 50mm of Rockwool or anti-echo foam pads and 15mm of blue sound block plasterboard for the walls. On the ceiling, add 50mm of Rockwool acoustic fibre board. You can do it yourself or let an expert handle the job.
We have a more detailed guide on shed soundproofing that can help you with this.
Alternatively, opt for a tongue and groove shed with 15mm to 20mm cladding if you’re getting a new unit. The extra thickness creates more space for air to be trapped, acting as insulation.
The thicker the cladding, the better it blocks outside noise. And the thicker the floor, the better it can support heavy instruments! Overall, this allows you to practise your music as late as you want, all in peace. How’s that sound?
Tune It Up with Electricity
A good electrical setup powers all your equipment and sets the mood for your music sessions. Wiring, sockets, and switches should meet the power requirements of your devices. These include amplifiers, speakers, mixing consoles, and instruments.
Best to factor in extras like extra lighting, so you’re covered for anything you add later. Plan the electrical system to accommodate those changes.
Hire a professional electrician if you’re not confident with electrical work. Might as well read this guide: Questions to Consider Installing Garden Building Electricity
Quick Garden Music Shed Makeover
Paint it. You can’t go wrong ight shades such as white, light grey, or misty blue for the walls and ceiling. If it’s a heavy metal band practising, maybe dark greys and reds will set the tone. Ultimately, try to choose a colour scheme that will fit the vibe of your music.
For the wall, consider stencil painting musical symbols, like treble clefs, notes, and so on. Or hang your favourite song lyrics in a frame. Better yet, design a banner with your music group’s official logo.
Set Up Your Recording Area

Provided the electricity is up and running, it’s time to set up your equipment and instruments.
It could be something like this: your computer or mixing console takes up a desk at the back. The speakers are positioned side by side, away from the walls and corners. This setup can improve sound quality and give you a better listening experience.
You can also organise everything by function. For instance, keep all your guitars, basses, and drums in one area and your audio equipment in another. But be sure to leave space to move around—you and your guests shouldn’t feel cramped while playing or recording.
Pair overhead indoor lighting with wall-mounted fixtures. This technique can give the room even coverage around your work area and instruments. Warm LEDs are easier on the eyes, too—perfect for long practice sessions.
Don’t forget to add your personal touches to make your music room feel inspiring and inviting! Consider these tips, and you’ll have a garden music shed where you can turn up the volume without disturbing the neighbours.
Get more tips here: How to Soundproof a Shed – The Ultimate Guide


