Jump to:
Welcome to our guide on making log storage outdoor, and say goodbye to messy log piles! In this guide, we’ll walk you through planning, material gathering, and construction. Plus, learn tips on enhancing durability and safety precautions. Read on and get ready to transform your outdoor space with organised firewood!
Planning
Before diving into the project, planning is key to ensuring a successful outcome. Consider factors like available space, the ideal location, and the capacity needed. Evaluate the area where you plan to install the outdoor log storage. You’ll want to make sure it’s large enough to accommodate the unit without crowding your garden. Next, choose a spot that’s convenient for access. Finally, estimate the amount of firewood you typically use. Ensure the storage capacity aligns with your needs to prevent overloading.
When contemplating materials, prioritise durability to withstand outdoor elements. Opt for weather-resistant wood or treated lumber to enhance longevity. Plan thoughtfully to simplify construction and ensure your log storage meets your needs. Grab a notepad, sketch your ideas, and envision an outdoor log storage that lasts.
Gathering Materials and Tools
Begin by making a list of what you need. Essential materials and tools will depend on your design. Prioritise high-quality ones for longevity, ensuring your garden log store withstands the elements. Your list can go like this:
Materials:
- Weather-resistant wood
- Treated lumber
- Screws or nails
- Wood stain or paint (optional for aesthetics)
- Wood preservative (optional for added durability)
Tools:
- Saw
- Drill
- Screwdriver
- Measuring tape
- Pencil or marker for marking measurements
- Safety gear (gloves, safety glasses)
- Level (for ensuring a straight and even structure)
- Sandpaper (for smoothing rough edges, if necessary)
Choose long-lasting wood like cedar or pressure-treated lumber. This enhances the project’s strength and extends your outdoor log storage’s lifespan.
Step-by-Step Construction Guide
Follow this step-by-step construction guide for creating your outdoor log storage with ease:
Step 1: Prepare the area
Before diving into construction, prepare the designated space for your outdoor log storage. Clear any debris, rocks, or other obstacles to ensure a level and stable foundation.
Step 2: Cutting materials
Armed with a saw, cut the wood pieces according to your pre-determined design. Precision is key here. Double-check measurements to avoid discrepancies later in the construction process. Accurate cuts lay the foundation for a seamless and well-constructed log storage shed.
Step 3: Assemble the base
The base serves as the foundation for your entire structure. Assemble it by securely connecting the cut wood pieces using screws or nails. A strong base is vital for your log storage’s stability and durability. Focus on aligning and connecting the pieces securely, reinforcing for extra strength.
Step 4: Add side panels
Once the base is in place, proceed to enhance the structure by attaching side panels. These panels both enclose the storage and protect the firewood from the elements. Ensure a secure attachment while being mindful to leave space for ventilation. Proper ventilation prevents moisture buildup, preserving the quality of the stored wood.
Step 5: Install the back
Strengthen the structure further by affixing the back panel. This reinforces the overall stability and provides additional support to the stored firewood. The back panel acts as a key component in ensuring the integrity of your outdoor log storage. Overall, it contributes to its long-lasting functionality.
Step 6: Roof or cover
Consider adding a roof or cover for extra protection against rain or snow. While optional, this feature extends the lifespan of both the storage and the stored wood. A well-designed roof shields the firewood from direct exposure to the elements. This helps keep its quality and makes your log storage more resilient in various weather.
Step 7: Finishing touches
Once the main structure is assembled, take a moment for the finishing touches. Sand any rough edges using fine-grit sandpaper for a smooth and polished surface. Besides aesthetics, doing so reduces the risk of splinters.
Additionally, consider applying shed stain or paint for protection and a personalised touch. The right finish adds a layer of defence against the elements. Even better, it also allows you to match the log storage with your outdoor decor.
Step 8: Inspect and reinforce
Thoroughly inspect your completed log storage to ensure all connections are secure. Pay close attention to joints, screws, and any points of attachment. If necessary, adjust to make the structure stronger and more stable.
Step 9: Final placement
After finishing construction, move your log storage to its planned spot. Consider the surroundings, making sure they match your initial plan. Proper placement not only improves functionality but also adds to your garden’s look. Take pride in creating a well-designed and strategically placed log storage unit.
Following these manageable steps guarantees a successful construction process.
Safety Precautions
Safety is paramount during the construction of your log garden building. Prioritise protective measures to ensure a secure building process. Always wear gloves and safety glasses to shield yourself from potential hazards. When using tools, exercise caution and adhere to manufacturer guidelines.
Be mindful of specific safety considerations related to materials and tools. For instance, you’re working with treated lumber. Take precautions to avoid inhalation of sawdust and wear a mask. Additionally, when handling sharp tools like saws or drills, maintain a steady grip. Focus on precision to minimise the risk of accidents.
Ensure a well-ventilated workspace, particularly if you’re using any chemicals or finishes. Keep the construction area organised to prevent tripping hazards. Also, store tools properly when not in use.
By following these safety measures, you protect yourself and ensure a safe and smooth DIY.
Round-up
Building log storage is about functionality and enhancing your outdoor space’s look. Every step plays a role in creating a durable and good-looking result. Keep safety in mind throughout. Now, with your unit ready, you have organised firewood and a DIY project that adds value to your outdoor area.
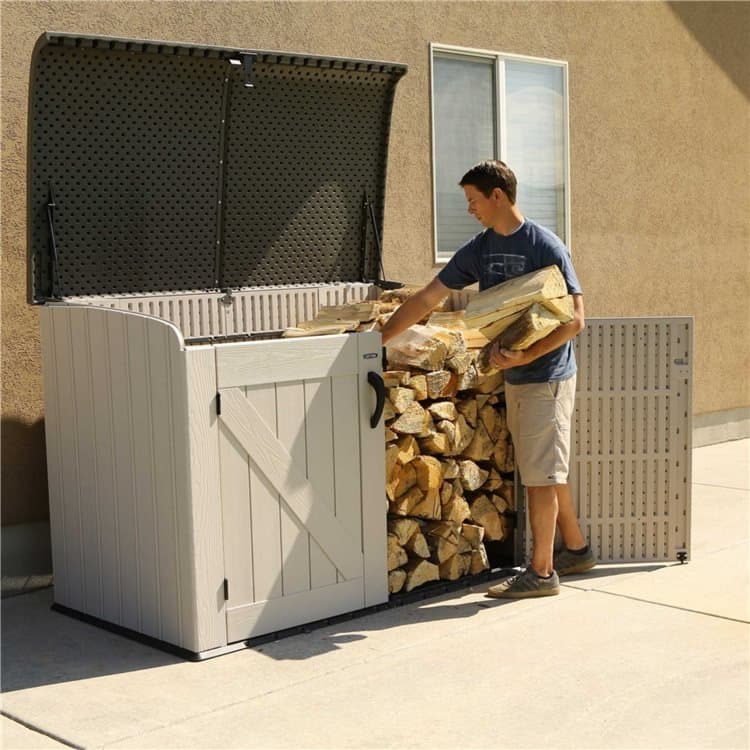
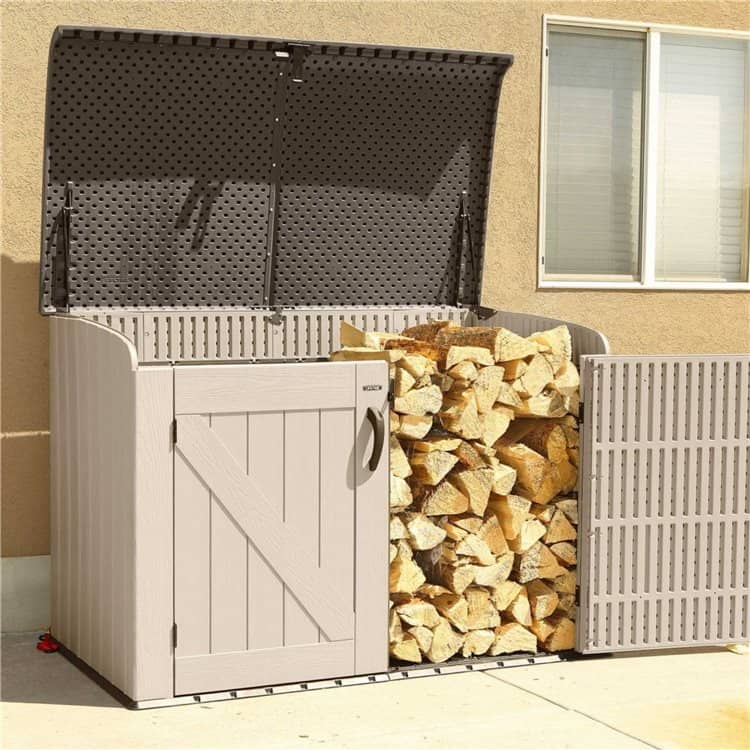
Discover a variety of garden storage solutions at Garden Buildings Direct. For a ready-made option, consider the Lifetime Horizontal Storage Shed.
Up next on your reading list: Practical Log Shed Ideas