Jump to:
In the heart of every cosy winter evening lies the comforting crackle of a roaring fire. But, to make those moments truly magical, there’s one essential component. And that is a well-seasoned, perfectly stored firewood, which cues for a practical log shed.
This blog will explore the top creative and cost-effective solutions for storing firewood. Get ready to be equipped with the knowledge and inspiration to build yours!
What Is a Log Shed?
A log shed is a specific type of garden shed designed to store firewood. Its main purpose is to keep your firewood dry, well-organised, and easily accessible. It especially comes in handy when you need it to fuel your fireplace, wood stove, or outdoor fire pit BBQ.
Moreover, log sheds help preserve the wood’s quality. They keep your firewood off the ground and sheltered from rain and snow. Proper airflow within the structure also aids in the natural drying process. This, in turn, makes the logs more efficient for burning.
Whether you buy or build one, it is an essential addition to your home. Particularly if you wish to have a steady supply of dry, seasoned firewood all seasons.
Log Shed Ideas
When taking the DIY approach, creativity shines. You can craft unique, cost-effective solutions using materials like pallet wood and more. Explore the inspiring ideas below to kickstart your project:
1. Pallet wood log shed
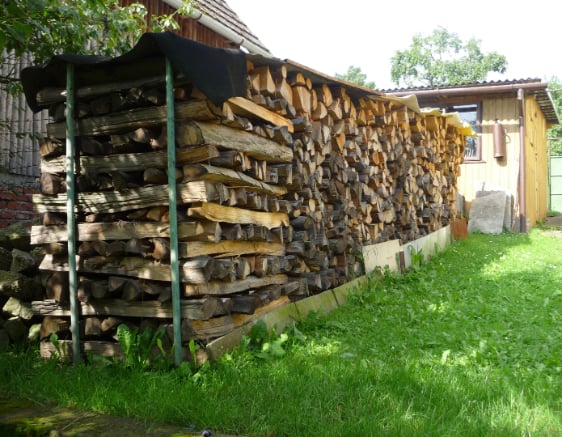
(Image Credit: Wikimedia Commons)
Pallet wood offers a fantastic option for the construction of a log shed, and here’s why. First, it’s incredibly cost-effective. Pallets are often readily available and, in some cases, free. This means substantial savings on this project. Additionally, it’s an environmentally friendly choice. For one, it upcycles wood that might otherwise go to waste.
To construct a pallet wood shed, follow these simple steps:
- Gather pallets: Source pallets in good condition. Look for those with minimal damage or rot.
- Plan and design: Create a design that suits your space and needs. Ensure it accommodates your pallets.
- Prepare the site: Level the ground where your shed will stand.
- Base and framework: Lay the pallets to form the base and walls, securing them in place.
- Roof and finish: Add a roof frame and cover it with more pallets or suitable roofing material. Finish by treating the wood to protect it from the elements.
For sourcing and preparing pallet wood, consider the following:
- Select pallets that are heat-treated (marked with HT) rather than chemically treated.
- Disassemble pallets carefully, salvaging intact wood pieces.
- Sand rough edges and surfaces for a neat, splinter-free finish.
2. Lean-to design
A lean-to log shed is a clever solution if you have limited outdoor space or prefer a more compact design. As the name suggests, the shed leans against an existing structure like your house or a garage. Its space-saving advantages let you store firewood effectively without sacrificing precious garden space.
To get started, prepare materials, such as pressure-treated lumber, for the frame. Plywood or metal roofing for protection and exterior-grade siding. Tools include a saw, hammer, nails, screws, level, and a drill.
The construction process goes like this:
- Planning: Start with a clear design and measurements. Consider the height, width, and depth of your shed.
- Foundation: Prepare a solid foundation, ensuring it’s level and properly anchored.
- Frame: Build the frame, connecting it securely to the existing structure.
- Siding and roof: Add exterior siding and a sloped roof for rain and snow runoff.
- Storage: Install shelves or racks for organised outside storage unit for the logs.
The location should have easy access to your home and allow proper airflow. Avoid places where water might pool or splash onto your firewood. A well-chosen spot ensures your lean-to log shed serves its purpose efficiently.
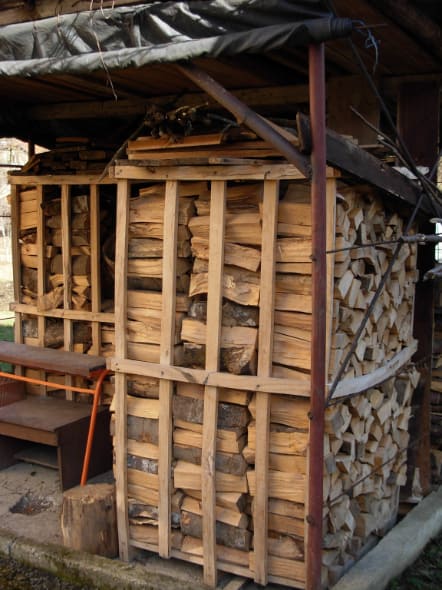
3. A-frame construction
The classic A-frame design is a timeless favourite among wood storage solutions. Its distinctive sloping roof resembles the letter ‘A’. One standout advantage is its efficient water runoff. It ensures your firewood stays dry even during heavy rains or snowfall.
When building an a-frame log shed, prepare the following materials and tools:
- Pressure-treated lumber for the frame
- Plywood or metal roofing
- Exterior siding
- Saw, hammer, nails, screws, level, and measuring tape
Next, refer to these construction steps:
- Foundation: Begin by building a shed base. Ensure it’s level and properly anchored to the ground.
- Frame: Build the A-frame frame, connecting the vertical and horizontal members securely. Measure the height and width according to your needs.
- Siding and roof: Add exterior siding to the frame. Then, attach the sloped roof, ensuring it overhangs to allow efficient water drainage.
- Storage configuration: Customise the interior with shelves, racks, or hooks. Such additions can help keep your firewood well-organised.
Top tip: Consider aspects like the size, door placement, and any additional features. This can include windows or a vent for improved airflow.
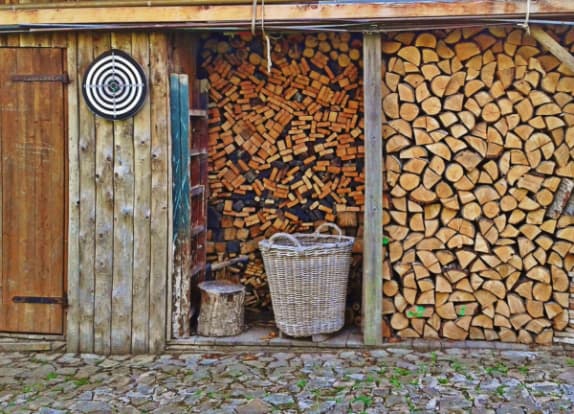
4. Firewood rack and shelter combo
(Image Credit: Wikimedia Commons)
Combining a firewood rack with a shelter is a brilliant concept for keeping your logs safe and sound. This hybrid solution offers the best of both worlds by 1.) providing protection against the elements and 2.) allowing convenient storage.
With a firewood rack shelter, your logs remain dry, shielding them from rain and snow. Moreover, it grants effortless access to the firewood. This eliminates the need to brave the elements when you need to restock your indoor woodpile.
To build one, follow these steps:
- Gather sturdy lumber for the frame, weather-resistant roofing material, and appropriate fasteners. Tools include a saw, drill, level, and measuring tape. Consider materials like pressure-treated lumber and metal roofing for durability.
- Plan the size and design, considering the amount of firewood you wish to store.
- Build the frame, ensuring it’s stable and level.
- Add the roof, ensuring proper slope for water runoff.
- Select a location with easy access to your home. Proper placement ensures your firewood remains in top condition and ready for use.
Log Shed Organisation Tips
Keeping your firewood well-organised is essential for efficient heating and firewood management. Stacking firewood correctly improves airflow and seasoning.
- To promote air circulation, stack wood in rows or crosswise patterns. This also aids in the drying and seasoning process.
- Place logs on pallets or a raised platform to prevent ground moisture absorption.
- For indoor storage, use shelves, hooks, or racks to maintain neat and accessible wood piles.
- Label different wood types and ageing levels. This ensures you use the right wood for your heating needs.
These techniques allow for clean burning and produce optimal heat. Properly organised firewood simplifies your heating experience. Most importantly, it ensures you get the most out of your wood-burning appliance.
Round-up
When building your own log shed, the key is to prioritise dry, accessible firewood. With these ideas, you can opt for the creativity of pallet wood sheds. Or the space-saving elegance of lean-to, the classic charm of A-frames – your choice! Paired with tips, you’re equipped to embark on your project. Happy building!
For all your log shed needs, look no further than Garden Buildings Direct. Explore our wide selection of garden sheds and outdoor storage solutions today!
Next on your reading list: Why Do I Need a Log Store?


