Jump to:
It’s relatively straightforward, especially if you have good building experience. With a friend’s help, you could finish this DIY project in only a day. Read our step-by-step guide on how to build a log cabin and get started!
Log cabins are constructed by mounting individual logs one atop the other. While your mental image of a log cabin might involve round logs straight from chopped trees, generally garden log cabins have had the wood trimmed to board planks so that they are a uniform size.
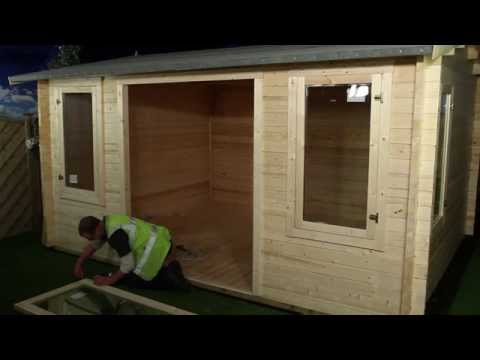
This video provides a quick look at the construction experience:
What you’ll need:
- Hammer
- Tape measure
- Spirit level
- Electric drill
- Screwdriver
- Wrench
- Saw
- Rubber mallet
- Ladder
- Bearer
- Base logs
- Support braces
- Roofing felt
Step 1: Prepare the ground
A firm and level base is important to ensure the garden building settles into perfection. We recommend a log cabin concrete base laid to the structure’s dimensions. Lay the floor bearers and evenly space them across the base. Leave at least a two-foot gap around the edge for easy access in the future.
Step 2: Lay the initial base logs
Once the bearers are in place, cut to size and lay down the first logs that will form the base of your cabin. Position them on top of the bearers and fasten them with screws to keep everything stable. Use a carpenter’s square to check the angles are square or measure diagonally from corner to corner. This ensures that your cabin will be properly aligned and sturdy.
Step 3: Wall logs, windows and door frame fitting
Tap the logs together using the rubber mallet. They should fit snugly into each other along their length. Once the walls reach about a third of the window openings, insert the windows firmly. Do so by pressing down at the top to seal gaps around the bottom.
Continue stacking the wall logs until they reach the height of the door frame. Fit the door frame pieces into the bottom, sides, and top of the frame. Securely tap them with the rubber mallet, and then complete the wall assembly.
Step 4: Install roof joists
After erecting the walls, it’s time to put in the roof joists. These are beams that support the roof. Insert them into the upright channels at the top of the walls. They should span from one side of the building to the other for stability. Ensure they fit snugly and are level to provide a sturdy foundation for the roof.
Step 5: Add decking and roof boards
To start building the decking, use the pressure-treated boards provided. Use one of the boards as a spacer to maintain even gaps between each board. Secure the boards to the bearers using screws.
Next, attach the exterior support beam to the corner of the decking. This will support the overhanging roof beam. You might need to trim it to fit using a saw since it’s not pre-cut. Use appropriate screws to secure it in place.
When working on the roof, place the first board on the beams with the groove facing away from the building. Align it with the end of the roof joists and secure it to all the roof beams.
The boards must be locked into place and flush at each edge. Also, ensure that the tongue and groove are properly aligned along the entire board. Secure them by nailing them to the roof beams. If the final roof board extends beyond the joist, trim it to be level with the end of the roof support beam. Don’t mind if there are any rough edges, as they’ll be covered by mineral roofing felt and fascia board.
Step 6: Install floorboards
Attach the floorboard to the wall with the groove facing out, then nail it down. Angle the nails for the following boards, ensuring each groove hides the nail from the previous one. Measure and trim floorboard sections to fit around the wall logs’ angles.
Get the cabin’s internal dimensions and cut finishing strips accordingly. Secure these strips around the floor’s edge to tidy up any rough edges and improve its appearance.
If you’re planning to use your building as a garden office, insulation is non-negotiable. Our insulated log cabins come with hybrid insulation for improved heat retention and overall efficiency.
Step 7: Put up the door
To install the door, align the hinges with those on the frame, then slide it into place. Once shut, the door’s edges are hidden by the frame, making it secure from outside access.
Tips: Test the door’s movement before securing it to ensure smooth opening and closing. To improve insulation, you may add weather stripping around the door frame.
Step 8: Add support braces
Support braces provide additional stability to the cabin, especially in windy conditions. Attach them to the interior walls, positioning one at the top and one at the bottom of each brace. Focus on near corners or areas prone to high winds to maximise their effectiveness. Drill through the wall log, then secure the brace with a nut and bolt.
Consider reinforcing the exterior with additional weatherproofing measures, such as sealing gaps. This will help further enhance the structure’s resilience against harsh weather conditions.
Step 9: Apply mineral felt roof and finishing boards
To cover the roof, roll out the felt and cut it to the required length, leaving a two-inch overhang on each end. Five strips of felt are needed.
Nail down the felt on each roof peak, spacing the nails two inches apart. Ensure each strip overlaps by at least an inch to prevent water infiltration. Install the strip covering the peak last.
Fold the overhang over the roof edge and secure it to the roof beams. Use fascia boards to press the felt down and screw them into the beams. Then, secure the felt to the front and back of the roof using evenly spaced tacks.
Congratulations, you’ve successfully put up your log cabin together!
We’ve laid out the process for a scratch build, but let’s be honest: cutting every joist and beam yourself takes a lot of time. Our kits arrive as a full timber kit made up of individual boards (for the walls, floor and roof sections). The right log cabin can turn a month-long carpentry job into a weekend project.
Also read: ‘How Are Log Cabins Delivered’ to know what you can expect on arrival, unloading, and placement at your property boundary.
FAQ
How do I handle the expansion and contraction of the logs?
Timber moves with changes in temperature and humidity as the cabin settles. The main issue is internal fittings. Avoid fixing heavy items like shelves, mirrors, or trunking with long screws that span multiple logs. If the logs move, this can cause splitting or restrict natural movement.
Learn more about log cabin expansion and contraction here.
Does the wood need treating before or after I assemble it?
Do it before. Once the cabin is assembled, these areas are difficult to reach, and they’re the parts most at risk from damp and rot. A good timber preservative on the floor bearers and the underside of the floorboards will help extend the life of the base structure.
Is it normal to see gaps between the logs after a dry summer?
Yes. Wood is hygroscopic, meaning it changes with moisture levels. It shrinks in dry, warm conditions and expands in colder, damp conditions. These gaps are normal and not a sign of structural damage.
Avoid sealing them with rigid materials like silicone or expanding foam. Get tips here on the correct way to fix log cabin wall gaps.


