Jump to:
Concrete is among the best options available for a log cabin base. As an incredibly strong material, it provides a firm footing for the structure to sit on. Generally, it could take you only three steps to build one. Prepare the following materials listed below, and you can get started:
- Spade: For excavating the ground for the foundation of the log cabin.
- Sand: To be used as a bedding material or mixed with cement to create concrete.
- Cement: To be mixed with water and aggregate (such as sand and gravel) to make concrete.
- Blocks: May be used as part of the foundation or support structure for the log cabin base.
- String line: To establish a level foundation.
- Level: To ensure that concrete slabs are flat and even.
Pro tip: When mixing your concrete, aim for a thick or mashed-like porridge consistency. If it’s too runny (too much water), the base will be weak and prone to cracking. If it’s too dry, it won’t level out. Get a well-balanced mix for a solid log cabin base.
Step 1: Mark out the area
- Mark out the area where your log cabin will sit, depending on the size of the bases needed.
- Allow for extra space beyond the dimensions required by at least 20cm (about 8 inches).
- Dig out using a spade to a depth of about 4 to 6 inches (approx. 15cm) down so the base will sit flush with your existing ground.
The additional allowance means a wider foundation = even weight distribution of the structure. Plus, it acts as a buffer zone that enables future adjustments without compromise. For example:
Your log cabin base size is 4m x 4m. Adding an extra 20cm to each side would result in a total base size of 4.4m x 4.4m. For 10 ft x 8 ft, it would be 10.7ft x 8.7 ft.
Make sure your measurements are accurate before starting groundwork. You can use the 3-4-5 method to get perfect square (90°) corners. Measure 3ft along one side and 4ft along the adjacent side. If the diagonal between those points measures 5ft, the corner is square.
Our log cabin range comes in various sizes, from small to large models. See what fits within your available space if you’re still narrowing down your choice.
Are Metal Sheds Noisy When It Rains?
Step 2: Set up the wooden formwork
We recommend using treated timber for this to prevent the wood from warping when it touches the wet concrete.
- Assemble a square wooden framework along the perimeter of the excavated space.
- Secure each beam with screws to make a secure frame, ensuring all corners sit square.
- Use a level to ensure the surface is positioned horizontally.
Following this, fill the area with coarse sand or gravel. Spread it evenly and compact it as much as possible to create a stable base for the concrete. Use a string line to confirm the frame is straight and square.
Before moving on to the next step, coat the inside of your wooden frame with a bit of vegetable oil or a dedicated release agent. This makes it much easier to remove the boards once the concrete has set without chipping the edges of your new base.
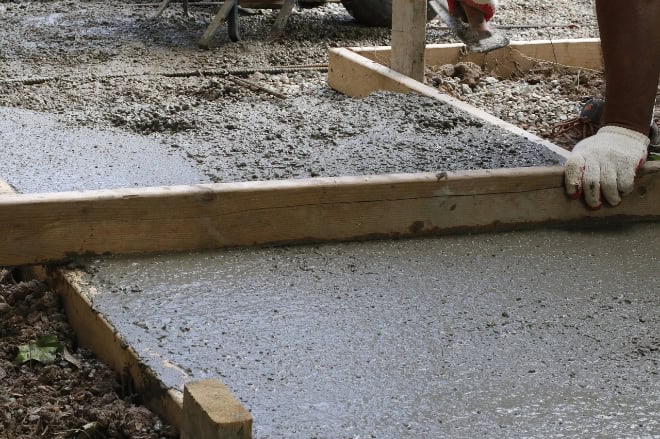
Step 3: Mix and pour the concrete

Mix four parts cement with one part sand or gravel. This mix gives the concrete the strength it needs once it sets.
- Pour the mix into the wooden frame and level it out as you go.
- Use concrete blocks if needed to help contain the mix, although the timber frame should hold it in place while it sets.
Wait for the ‘bleed water’ (the thin layer of water that rises to the top) to disappear before you do your final throwel finish. Leave the concrete to fully cure for at least a week before installing your garden building on top.
Pro tip: For over 4m x 4m log cabins, consider adding steel mesh or rebar into the middle of your concrete pour. This adds tensile strength, which helps the base withstand the heavy weight.
We have a few more selections available to browse:
We hope this quick guide proves useful if you choose to build the log cabin base yourself. For long-term maintenance, see this guide on log cabin expansion and contraction. It has what you need to know to further prevent the structure from pulling itself apart.
FAQ
Do I need a DPC (Damp Proof Course)?
Yes, you’ll need to lay it once your concrete base is dry. A DPC (Damp Proof Course) is a layer placed between the base and the timber to stop moisture from rising up from the ground. Doing this before installing the log cabin helps prevent damp from getting into the wood.
How thick should the log cabin concrete base be?
A thickness of 100mm (4 inches) is sufficient for standard use such as storage, seating, or light furniture. But for larger cabins or those that will hold heavier loads, such as gym equipment or workshop machinery, go for a 150mm (6 inches) base.
How do I know the ground is ready for a concrete base?
The ground should be firm, level, and cleared of any grass, roots, or loose soil. If it feels soft or uneven, it will need compacting before you start. See if the surface is uneven or gives way when you walk on it.
Can I build the base straight on soil?
No. The soil needs to be prepared first and topped with a suitable sub-base like compacted hardcore or gravel.
This layer helps spread the load evenly, reduces movement, and improves drainage underneath the concrete. Without it, the base is more likely to shift, crack, or sink over time.


