Jump to:
How do I damp proof my shed?
It’s a question that’s on every ‘sheddie’s’ lips. But the answers are scattered far and wide across the internet. So if you’ve got a garden shed or office that you want insulated and damp-proofed – you’re in the right place.
So what we’ve done to answer all your questions on how to keep dampness out of sheds is bring an old guide back off the bench. We’ve updated our guide to damp-proofing a shed for 2021. And we’re going to do our best to quickly and succinctly answer every question on damp.
If you’re ready for sure-to-work tips and hacks for damp-proofing a shed, read on!
Key takeaways
Let’s make things easy by breaking down a few key things about damp-proofing your storage shed:
- Damp can be caused by shed condensation, leaks, rising dampness, and pooling groundwater
- Dampness can cause respiratory problems and irritate asthma
- Damp items should be removed from storage sheds
- Mould and mildew can be treated with sprays
- Gaps in window and door frames should be sealed
- Not all wooden sheds need to be insulated, but regular treatment is necessary
- Ventilation is key to preventing damp
Key terms
- Damp – Moisture diffused through the air or a solid substance
- Ingress – The action of entering (e.g. for rainwater)
- Caulk – To seal a gap with filler
- Roof vapour barrier or membrane – A sheet of plastic that is impermeable to water vapour.
- Single-skin structure – A structure made from one layer of material

Part 1: Shed Damp
To understand how to damp-proof a timber shed, first, we have to understand what damp is. Let’s get a definition of damp down, then we’ll move on to protecting your shed against it.
What is damp?
Damp is the presence of moisture, mildew, and mould in buildings. Damp can occur in sheds due to external (e.g. rain) or internal (e.g. condensation) factors. If left untreated, it can damage your wooden shed and cause health problems.
What is mould?
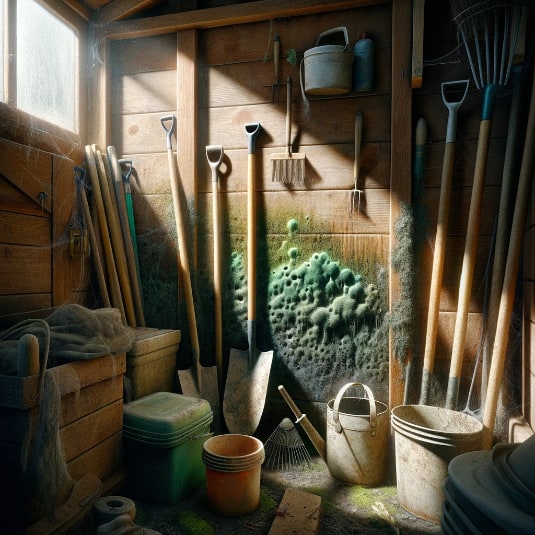
When you don’t air out your shed, it invites moisture build-up. This, in turn, creates mould spores. Mould is a fungus and can cause ‘black mould’ in cellulose-rich building materials (i.e. wood).
What is mildew?
Mildew is a type of mould but not the other way around. It’s a living organism that grows where there is:
- warmth
- damp
- humidity
- organic matter
The term mildew is often used generically to refer to mould growth. However, it’s a bit different and, as such, might require a different treatment than mould.
Is damp bad for you?
One of the main causes of dampness in sheds is humidity. Now, air humidity of around 30-60% is ideal for humans. But below 30%, we can experience dry skin and lips, itchiness, and scratchy throats.
Above 60% can cause sweating or mould, mildew, and damp in your shed. And if you have these issues in your home, you’re more likely to have respiratory problems. Remember, just breathing in your shed can create moisture that leads to dampness.
What causes damp?
Damp is caused by excess moisture. This moisture can come from:
- A leaky roof
- Rising damp
- Damage to windows
- Rain and groundwater ingress
- Condensation
So, what is condensation?
Condensation is when water in gas (vapour) reverts to a liquid state (as droplets). This occurs between a cold surface and hot air. This is because cold air has less moisture in it than warmer air. This is why we often see it on a surface that divides two areas of different temperatures. For example, a window in your shed. This process can be worse in seasons with more moisture in the air, like spring and winter.
Damp can also be caused by decomposing grease pests and organic materials. Storage of damp furniture, equipment, and even bikes can also contribute to damp.
Why is my wooden shed damp?
One of the main causes of damp in garden sheds is interior condensation. Factors that can affect dampness in a shed are:
- Single-glazed windows – With direct contact with the outside air.
- Rising damp – From water absorbed by groundwork in a concrete base.
- Leaks – From guttering and/or roofing.
- Treated air – Heated or air-conditioned inside air is different to the outside temperature.
Dampness in a wooden shed can be made worse in winter. This is due to colder air outside as well as less regular aeration – with windows closed against the cold.
Why is damping bad for wooden sheds?
Damp is not only a health risk but also a concern for outdoor structures like log cabins. Wood, or timber, is one of the most susceptible materials to damage by moist conditions. These conditions can also be worsened by bouts of wet weather and poor airflow in sheds.
The results can be:
- Premature rot
- Mould on walls and roof
- Warping and sagging of timber
These are not just bad for wooden garden sheds, but they’re potentially dangerous, too. Rot and sagging timber can make your outdoor shed structurally unsound!
Getting Rid of Mould in a Shed
So, now that we’ve answered what damp is, let’s look at how to get rid of mould and mildew in your shed.
How do I prevent mould in my shed?
One of the first questions to ask when damp-proofing your shed is: Are you in it regularly?
If it’s during winter, the answer is – probably not. And there’s your first problem. With no fresh air flow, stagnant air just sits in your shed. This air holds moisture and can condense on walls and windows. Boom – now you have mould and mildew in your shed. So make sure you air out your storage building.
It’s also smart to avoid storing damp items in your shed. This includes everything from rags to tools and bikes. Yep, even bikes! If you do have to store things in your outbuilding, make sure to dry them off before they go back in the shed.
If you’ve invested in a pressure treated shed, you shouldn’t need to treat the inside. However, if you want to prevent ‘interior’ mould, consider the following:
- Keep it ventilated: Open doors and windows or install vents. Doing so allows moisture to diffuse from high to low concentration (i.e. inside to out).
- Insulate it: Maintain your shed’s interior temp. And provide a layer to stop condensation from hitting surfaces.
- Seal gaps: Caulk your shed’s base. Use a draught excluder. Spray windows with expanding foam.
- Guttering: Install guttering for run-off and prevent moisture from leaking through the roof.
- Membrane: Think about installing a vapour membrane between your shed’s framing.
- Get a hygrometer and dehumidifier: A hygrometer measures humidity. Meanwhile, a dehumidifier will treat air and remove excess moisture.
Note: Prepare a plug socket for the last two items or buy battery-operated versions.
How do I stop my shed from going mouldy?
The best way to treat mould in a damp shed is to stop it from forming. Still, to treat shed mould or stop your shed from going mouldy, follow these steps:
- Remove everything from your shed. You can use this stage to check furniture and tools for dampness and mould.
- Check your shed’s base for spills and the roof/walls for leaks.
- Fill a spray bottle with a diluted bleach solution (1 part bleach to 4-10 parts water). Wear gloves and old clothes. Open all shed doors and windows and treat mould with spray and a sponge.
- Leave your shed to air out for a full day if possible.
- Apply shed treatment and pesticide to the outside timber of your shed.
- Leave the building to air.
- Respray affected areas with a diluted vinegar spray. You can add a fragrance to combat the smell of vinegar.
- (Optional) Leave open containers of baking soda or a dehumidifier in your shed.
How to get rid of musty odour in a storage shed?
To get rid of musty odours in storage sheds, you first need to combat the cause. This will probably be mould, mildew, and damp. Remove everything to check for structural damp and offending items (e.g., damp cloths and rags).
Then, clean your wooden shed’s walls and floors with a diluted bleach spray. Make sure to ventilate your shed whilst cleaning. Rinse the bleach off and dry thoroughly. Top tip: Immediately wash and dry the clothes and shoes you wore while cleaning. Try not to bring dampness or mould back into your house!
Tips for removing damp and mould from a shed
Our first tip is – don’t let mould sit. Try to remove mould as soon as you see it. Also, make sure to protect yourself when tackling mould in your garden outbuilding. Make sure to wear a surgical mask or a ski mask. You don’t want to inhale mould spores, leading to asthma and respiratory problems.
Also, wear gloves when cleaning. Remember to try and protect your plants. If you’re removing mould from your wooden shed’s exterior, consider what damage you might cause to plants.
Try to opt for a diluted cleaning solution. Water your plants beforehand to discourage chemicals from bonding with them. Top tip: For a natural mould and mildew treatment, dilute white vinegar in a spray bottle. Use with a sponge soaked in hot water and baking soda. Always make sure to ventilate your wooden shed whilst cleaning.

Part 2: Insulating a Shed
Disclaimer: Insulating your shed is not necessarily something you will need to do. For instance, if you have a tongue and groove shed, insulation won’t be necessary. Additionally, you may find it hard to install insulation batts in a metal shed. This is due to their single-skin and rail construction. Basically, there’s nowhere to put batts!
Overall, shed insulation allows for consistent temperature regulation. This means you can keep warm air in and keep cold air out.
Key takeaways
- Make sure your shed is dry, waterproof and in good condition (or new) before insulating
- Combat draughts by sealing gaps around window and door frames
- Choose the appropriate insulation (and membrane) material
- Secure insulation batts with board or plasterboard panels
So, why do wooden sheds need insulation?
Dew point definition
The reason you might think about insulating your wooden garden shed is because of the dew point.
According to Google, this is:
‘It’s the temperature at which water droplets start to condense and dew forms.’ In your shed, this is where humid air can lead to condensation.
Granted, metal shed condensation can be worse due to metal conducting heat better. But areas like windows and door frames are still at risk from condensation.
With insulation, you can trap heat inside and regulate that temperature versus outside. Wooden prefab sheds are often the best solution to this as they offer a tight seal and good insulation. However, your needs will also depend on what sort of climate you live in.
What can I insulate my shed with?
There are a lot of different options for insulating a wooden garden shed, including:
Bubble wrap
Yes, you could really use bubble wrap to insulate your shed. We’d suggest you at least go for the foil-backed kind, though. Easily affix bubble wrap to walls and ceilings with an adhesive or staples.
However, its heat and sound insulation properties are fairly minimal. Only use this option if it’s the only thing going.
Fibreglass insulation
Fibreglass is especially good at blocking sound and comes in insulation batts. These can be fitted in your wooden shed’s frame. Remember always to wear:
- Glasses
- Gloves
- A face mask
When working with insulation. Small pieces of fibreglass can cause irritation if inhaled and also to the eyes and skin.
Top tip: After installing your insulation, take a cold shower first. This will help to close your pores and wash off any microfibres. Then you can finish with a hot shower.
PIR insulation boards
PIR is a type of rigid insulation board that’s popular for walls and even flooring. It’s also fibre-free and comes in foil-backed boards of varying thicknesses. Its popularity means that you should be able to fit suitable sizes to fit your wall cavity. Simply cut boards to size and slide them in.
Wool
If you want the insulation offered by fibreglass without the itchiness – go for thermal wool. This is also a more environmentally friendly solution. Plus, wool offers stellar insulation and is safe to handle.
Cladding for shed insulation
You can consider changing or adding additional cladding to insulate your shed better:
Plasterboard
Plasterboard will offer effective wall covering. The problem is that it’s quite flimsy and won’t offer that much resistance against water and dampness.
Hardboard
Hardboard sheets are a step up from plasterboard in terms of strength. But they still won’t offer much in the way of water resistance.
Plywood
The good thing about plywood is that it comes in varying thicknesses. Plywood will prove sufficient for wall-boarding. Plus, it’s tough and durable.
Tongue and groove
Tongue and groove wooden sheds equal a robust build with a sleek design. It’s also a lot easier to paint and treat timber due to there being no overlap. A tongue and groove design also means that sheds are weather-resistant and well-insulated.
Pallet board
By de-nailing and sanding down old pallet boards, you can clad the outside of your shed and be on-trend. Re-purposing and pallet boards are all the rage at the moment. Simply stain and treat the boards and affix them to your shed’s vertical struts.
Heating your shed
If you can’t or don’t want to add cladding or insulation to your shed, you could always heat it. Doing so can help to regulate the difference in indoor and outdoor temperatures.
Consider using an electric radiator on a low setting. This will be cheap to run and energy-efficient. Or, you could invest in a tubular heater for constant, low-level heat. They are well-suited for prolonged heating of an area due to their very low running costs.
How can I insulate my shed cheaply?
We’ve written a quick guide here to learn more about how to insulate a shed. But it’s fair to say you might be wondering how you can insulate your shed cheaply.
- Cheapest way: Foil-backed bubble wrap (available at DIY/hardware stores. As cheap as £14.99 on eBay for an 8.4m roll)
- Medium-cost way: Fibreglass, wool, or PIR insulation
- More expensive way: Insulation batts and a vapour membrane. And/or installing double-glazing
Barring these options, some quick fixes to cheaply insulate your shed are:
- Sealing window and door frames with a silicone gun set
- Buying a draught excluder
- Laying down carpet
How do you seal the bottom of a shed?
With timber and wooden garden sheds, you shouldn’t need to seal the base. However, make sure that timber and flooring are treated. Also, a timber-frame subfloor or base can help to raise your shed off the ground. A gravel base can then provide adequate ventilation and drainage.
If you’re building a concrete, brick shed, or metal shed, you will need to seal the base. Then, the following will apply to all sheds (including sealing your wooden shed, if you decide to).
- Using silicone or a mastic sealant, seal around your shed’s base on the outside
- Repeat the step for the base on the inside if need be
- (Optional) Do the same for any exposed bolt holes
- Alternatively, use a liquid damp seal and paint on
Sealing the base of your shed in this manner can help with water resistance and ingress.
What is the best covering for a shed roof?
Most sheds are built with waterproof roofing materials. However, even felt and bitumen shingles can become water-damaged over time.
To have the best roof for your wooden shed, ensure you seal the joints properly and fit the felt accurately. For an upgrade from felt shingles, you could also consider using weather-resistant EPDM. This is a synthetic rubber for shed roofs that provides waterproofing. For a metal shed, you might even consider anti-condensation roofing panels.

Part 3: Damp-proofing a Shed
By this stage in our ultimate guide, we’ve run through what damp is and how to insulate your shed. Now, let’s move on to damp-proofing your shed building.
How to damp-proof a shed?
To damp-proof a wooden shed, open doors and windows or install shed vents to circulate air. Reduce moisture levels in your garden shed by circulating air to combat dampness. You can also use a dehumidifier in your outdoor shed to stop moisture buildup, which causes damp.
So, if you’re asking yourself, ‘How do you damp-proof an outbuilding?’ There are three main areas you need to consider.
Roof
To damp-proof your shed, you need to protect it from moisture up high as well as down low. Check your roof for any gaps, holes, and leaks. Are these being caused by insufficient drainage? If so, you might want to think about upgrading your shed guttering system.
A guttering and water butt system can ensure that runoff is further directed away from your shed’s base. This, in turn, can combat water pooling and even rising damp.
Felt roof shingles, on the other hand, offer good value for money. But like any roof material, they will deteriorate over time. Lucky for you, you can repair a felt roof with silicone gutter sealant. Simply secure loose patches and rips and tears.
If you need to replace your wooden shed’s roof, though, consider doing so with EPDM.
Windows and doors
Windows and doors can be particular pain points for damp-proofing wooden sheds. Wood can rot, crack, and shrink over time. The resultant gaps can cause rainwater to ingress easily. So, start by regularly treating and maintaining your wooden frame.
If need be, apply wood filler or expanding foam to seal up gaps in window frames. Then, simply cut off the excess. You can repeat this process with your door frame. Alternatively, you can buy a draught excluder to tuck at the bottom of your shed door.
Single-glazed windows will also have more direct contact with outside air. Think about installing double-glazed windows to provide further insulation and protection against damp. The compressed air between double-glazed glass creates a vacuum. This means that the transfer of heat is greatly reduced.
Walls
Regularly treat wooden sheds with wood treatment and stain to protect against rot. Combating rot before it occurs is your best defence against damp. Once rot sets in, it can compromise your wooden shed. It’ll also create moist conditions that can lead to further dampness in your wooden shed.
Storage solutions to damp-proof a shed
Another line of defence to prevent moisture in a shed is simple storage. Try to dry tools and equipment off before returning them to your storage shed. You can also use storage boxes and drawers to create tight seals around tools. This can help prevent rust, corrosion, and dampness.
Top tip: Go one further and put silica sachets in your tool drawers to absorb moisture.
Expanding foam and caulking
Expanding foam and silicone can be useful for sealing gaps in your wooden shed’s frame. Any opening through which wind might blow, like door and window frames, is prone to water ingress.
To combat this, use an expanding foam spray in visible gaps and shave off the excess. Or, use a silicone sealant around your frames and joins to provide a water-tight seal.
How to ventilate a damp shed?
- Install vents in your shed’s eaves, windows, and skylights
- Install a whirligig to your shed’s roof or an electric fan in your shed’s eaves
- Also, heat your wooden shed or use a dehumidifier and monitor humidity with a hygrometer
To ventilate a small wooden shed, you’ll need some form of passive ventilation. This can be achieved by installing vents in your shed’s eaves or even just drilling some holes. Make sure to do this at both ends of your shed in the direction of steady airflow.
Circulating airflow in your shed means that moisture-rich air won’t hang around. It can also help to regulate your shed’s indoor temperature versus outdoors.
Think about what you need to use your shed for. If you’re utilising it as a garden office or workshop shed, ventilation is key. You don’t want tools and even electronics suffering from damp conditions. Installing a whirligig to sit on your shed’s roof or an electric fan can help to regulate air.
How to build a damp-proof shed base
Building a concrete shed base for your shed floor can lead to issues like rising dampness. For one, concrete is porous and can absorb moisture from the surrounding ground.
Rising damp is when this water from the ground is absorbed through floor bearers into your shed’s floor. To build a damp-proof concrete shed base – make sure to put a damp-proof membrane under your shed. Also, allow your base to dry sufficiently, and don’t build it much larger than your shed’s actual base.
On top of this, simple measures like considering the lay of the land will help to stop any issues. Try to build your shed base in an area that:
- Has adequate drainage
- It isn’t on boggy or marshy land
- Is higher than the surrounding area
- Isn’t close to overhanging or dense shrubbery
To damp proof a shed’s base you need to make sure to build a barrier between your shed’s floor and the ground. You can do this by constructing a simple timber substructure. This space will allow for ventilation and provide a barrier from ground moisture.
You could also look at constructing a gravel base for your wooden shed. Creating a garden shed base from gravel also allows for proper drainage. This way, you won’t get water pooling around your wooden shed base.
And, to get the best of both worlds, you could use a grid system foundation, such as this eco base. This provides ground clearance and can be filled with gravel to allow for drainage. Then, you can use laminate, plywood, vinyl, or even carpet to keep any chill off your wooden shed base.
Timber treatment for sheds
You can also prevent damp in your wooden shed by treating timber with waterproof paint. Timber will need to be treated regularly anyway to prevent rot and cracking. Opt for treatments with mould and fungal inhibitors for best results.

Part 4: Vapour Membranes for Damp-proofing a Shed
One of the most common questions we hear when talking about damp proofing a wooden shed is – do I need a membrane? So, to finish off our guide on all things sheds and damp, we’re going to cover shed membranes once and for all!
Does a shed need a membrane?
If you’ve read this guide then (firstly, well done!), you should have figured out how to damp-proof a shed floor. We’ve also covered insulating and damp-proofing your shed’s roof. But when do you need a membrane? Let’s start small:
What is a shed membrane? It’s a plastic sheet layer between your shed’s walls and insulation to help with moisture. Properly defined, a vapour barrier alone doesn’t control air movement. Instead, it controls the movement of moisture.
In cold weather, it can prevent moisture from soaking into your insulation. In hot weather, a vapour barrier can stop hot, humid air ingress into your shed. Either way, it can help prevent rot, mould, and even damp insulation.
However, putting one on the outside of the framing runs the risk of condensation forming. But it will further protect your shed from rain and water ingress. So, when using a shed membrane and insulation, check the guidelines first!
Below are the shed and climate comparisons for vapour membranes:
1. Hot, humid climate
Do you live in a hot and humid climate, and you insulate your shed or use an air-conditioner? If so, put your vapour barrier on the outside of your wooden shed’s walls.
This will stop moisture from entering your timber shed. That’s because moisture ingress will be absorbed by cool, dry air inside your shed.
2. Cold climate
Do you live in a cold climate and use your outdoor shed year-round? If so, you’ll need to insulate and heat it anyway to prevent damp.
If you add a vapour membrane to your wooden shed, place it on the inside of your framing. This will protect your insulation and frame from moisture-rich air inside your shed. Any moisture ingress to your wooden frame should be absorbed by outside air at night when it’s colder.
3. Non-climate controlled shed
If you don’t heat your shed or use air-conditioning, then you don’t need a vapour barrier.
Otherwise, it’ll just cause condensation and dampness. If you’re building a concrete shed base, however, you still need to sink a moisture membrane under your slab. This will help against rising damp.
4. Un-insulated
Like an unheated shed, a shed with no insulation doesn’t need a vapour barrier. This is because any moisture built up (even in hot weather) should be removed by colder air at night. It’s important that you still properly ventilate your shed for this to happen, though!
5. Insulated
If you insulate your shed but don’t heat or air-condition it, don’t use a vapour barrier. Otherwise, it will only trap moisture in hot weather. In contrast, insulation slows heat transfer.
To break shed membranes and damp-proofing down for you, we’ve come up with a comprehensive comparison.
Shed and Climate Comparison for Vapour Membranes
Hot humid climate
Do you live in a hot and humid climate and you insulate your shed or use an air-conditioner?
If so, put your vapour barrier on the outside of your wooden shed’s walls.
This will stop moisture from entering your timber shed. That’s because moisture ingress will be absorbed by cool, dry air inside your shed.
Cold climate
Do you live in a cold climate and use your outdoor shed year-round? If so, you’ll need to insulate and heat it anyway to prevent damp.
If you add a vapour membrane to your wooden shed, place it on the inside of your framing.
This will protect your insulation and frame from moisture-rich air inside your shed. Any moisture ingress to your wooden frame should be absorbed by outside air at night when it's colder.
Non-climate controlled shed
If you don’t heat your shed or use air-conditioning then you don’t need a vapour barrier.
Otherwise, it’ll just cause condensation and damp. If you’re building a concrete shed base, however, you still need to sink a moisture membrane under your slab. This will help against rising damp.
Un-insulated
Like an unheated shed, a shed with no insulation doesn’t need a vapour barrier.
This is because any moisture-build up (even in hot weather) should be removed by colder air at night. It’s important that you still properly ventilate your shed for this to happen, though!
Insulated
If you insulate your shed but don’t heat or air-condition it, don’t use a vapour barrier.
Insulation slows heat transfer but a further vapour barrier will just trap moisture in hot weather.
Do you still have questions about using a moisture membrane in your shed? If so, read this quick guide as to if you need a vapour barrier in your shed or not.

Part 5: Shed Maintenance and Longevity

Regular maintenance is the key to ensuring your shed stands the test of time. It helps identify issues before they become costly problems. Moreover, it maintains the structural integrity of the shed.
Create a seasonal checklist for upkeep. This could include inspecting the roof and checking for leaks. Ensure doors and windows are sealed properly. Also, clean the interior to prevent moisture buildup.
Preservation starts with quality materials, proper construction, and regular care. Seal any gaps. Apply protective coatings. Address rust or wood rot promptly to extend your shed’s lifespan.
Look for signs like peeling paint, discoloured walls, or a musty odour. These could indicate dampness or insulation problems. Regular inspections will help you catch these issues early. Even better, it prevents costly repairs down the line.
Part 6: Eco-friendly Insulation Options
(Image Credit: Wikimedia Commons)
Opting for sustainable insulation materials is an eco-conscious choice. Consider materials like recycled denim, sheep’s wool, or cork. Such options have a minimal environmental impact and are biodegradable.
Eco-friendly insulation often provides excellent thermal performance, moisture resistance, and indoor air quality. It’s a win-win for your shed and the planet. Furthermore, you can significantly reduce your shed’s carbon footprint. Lower energy consumption means a smaller environmental impact.
Part 7: Shed Security

Once you’ve invested time and effort in insulating your shed, securing it becomes even more vital. Insulation improves its comfort and value, making it an appealing target for theft. Protecting your investment ensures you reap the full benefits of your insulated space.
Tips for securing your garden storage shed
- Install high-quality shed locks and deadbolts on doors.
- Reinforce windows with security film or bars.
- Use motion-activated lighting to deter intruders.
- Consider a sturdy hasp padlock and staple for extra door security.
Modern security goes beyond traditional shed door locks. Explore options like wireless alarms, security cameras, and smart locks. These devices provide remote monitoring and instant alerts, enhancing the outbuilding’s protection.
Consider a secure storage cabinet or cheap safes if you store valuable items. This extra layer of protection helps deter thieves and keeps your possessions safe.
Part 8: Legal Regulations and Permits
Before you begin your shed project, you need to understand the local regulations in your area. These requirements can vary widely, so research the rules specific to your location.
When do you need a permit to build a shed?
Typically, you’ll need a permit for a shed if it exceeds a certain size or height or if it’s intended for habitation. Some jurisdictions also require permits for electrical or plumbing work in the shed. Check with your local planning department to determine your specific permit requirements.
Compliance with zoning and building codes is essential, particularly when insulating a shed. These codes dictate construction standards, safety measures, and allowable uses of the structure. Ensure your shed project aligns with these codes to avoid potential legal issues.
Navigating legal requirements
Consult with local authorities. Obtain necessary permits. Follow building codes to ensure a smooth and legal shed project. Failing to do so may result in fines, delays, or even the removal of your shed. It’s best to navigate legal requirements from the outset.
How To Damp Proof a Wooden Shed
There you have it – our updated mega-guide to damp-proofing a wooden shed.
We’ve searched and scoured the internet and racked our brains to come up with all the best answers to your questions. Refer back to this guide if you ever have questions about damp-proofing or insulating your wooden shed.
And tell your friends! The next time someone asks you how to damp proof their shed, send them our way. We’ll answer every question they’ve got.
But just to recap, if you want to damp proof a wooden shed:
- Make sure to ventilate your wooden shed by opening doors and windows to allow airflow
- Install double-glazing in your shed to regulate temperature
- Make sure to seal any gaps in your wooden shed’s frame with expanding foam or silicone
- Patch felt roof shingles or replace them with EPDM
- Direct excess water away from your shed’s roof and base with roof guttering
- Treat wood regularly
- Remove damp items and spills and lock up tools
- Clean any mildew and mould with bleach or vinegar spray
- Insulate and use a vapour membrane where necessary
- Heat or air-condition your shed and use a dehumidifier
Undecided between damp-proofing a timber shed or a metal shed? Then check out our guide to stopping condensation in metal sheds! Next on your reading list: Metal Shed Insulation: What Type of Insulation Is Best?
Shop The Master Apex ShedFAQs
How do you moisture-proof a shed?
Treating the timber of your wooden shed can provide it with a weather-resistant exterior. Further insulation and vapour membranes can be used in a wooden shed’s walls to prevent moisture ingress. Any gaps around your shed’s windows, roof, and door should be sealed.
How do you keep a shed damp-free?
To keep a shed-damp free make sure to store tools in tightly-sealed containers with silica packets. Don’t store damp items or open liquid containers in your storage shed. Make sure to ventilate or regularly aerate your shed to keep it damp-free.
How do you seal the base of a shed?
For concrete shed bases and metal sheds, sealing the base is essential. You might also decide to seal the base of your timber shed, though. Work around the outside first, following the line of your shed’s base with a silicone gun. Repeat on the inside.
Then, make sure to use a draught excluder for gaps that you can’t seal, like the base of your shed’s door.
How does a dehumidifier work?
A dehumidifier works by drawing in moisture-rich, humid air and running it over refrigerated coils. As the water in the air condenses, the moisture is removed and collected in the dehumidifier. Cold, moisture-free air is then filtered back into the room.