Jump to:
A summerhouse is only as good as the base beneath it. Use concrete, and follow this guide for pouring and laying it. Ready?
How to Lay a Concrete Summerhouse Base
Before jumping into the steps, grab a pen and jot down all the tools and materials you’ll need. You can add or remove items as needed.
Tools
- Tape measure
- String line and pegs
- Spirit level (preferably 1200mm+)
- Shovel and spade
- Wheelbarrow
- Plate compactor (wacker plate)
- Hammer and nails/screws
- Saw (for timber formwork)
- Float and steel trowel
- Straight edge (long timber or screed bar)
- Tamper (or length of timber for compacting concrete)
- Drill/driver
Materials
- MOT Type 1 hardcore
- Sharp sand (if a blinding layer is needed)
- Cement (if mixing yourself)
- Ready-mix concrete (alternative option)
- Damp Proof Membrane (DPM) – 1200 gauge minimum
- Timber for formwork (treated, straight lengths)
- Stakes/pegs for securing formwork
We can now start the steps.
1. Measure and excavate
- Mark out the base area using string lines and pegs.
- Remove all turf, roots, and any soft spots from the ground.
- Excavate to a depth of 150 to 200mm (6 to 8 inches) from finished ground level. Over-excavate by approximately 50mm on each side to accommodate the formwork.
Tip: Keep the base as level as possible during digging.
2. Lay and compact MOT type 1 hardcore
Spread 75 to 100mm (3 to 4 inches) of MOT Type 1 across the excavated area.
- Rake it level before compacting.
- Compact in layers if needed, but no more than 50mm per pass.
- Final compaction using a plate compactor until the surface is firm and stable.
Optional: Add a thin sand blinding layer about 10 to 20mm to avoid puncturing the membrane.
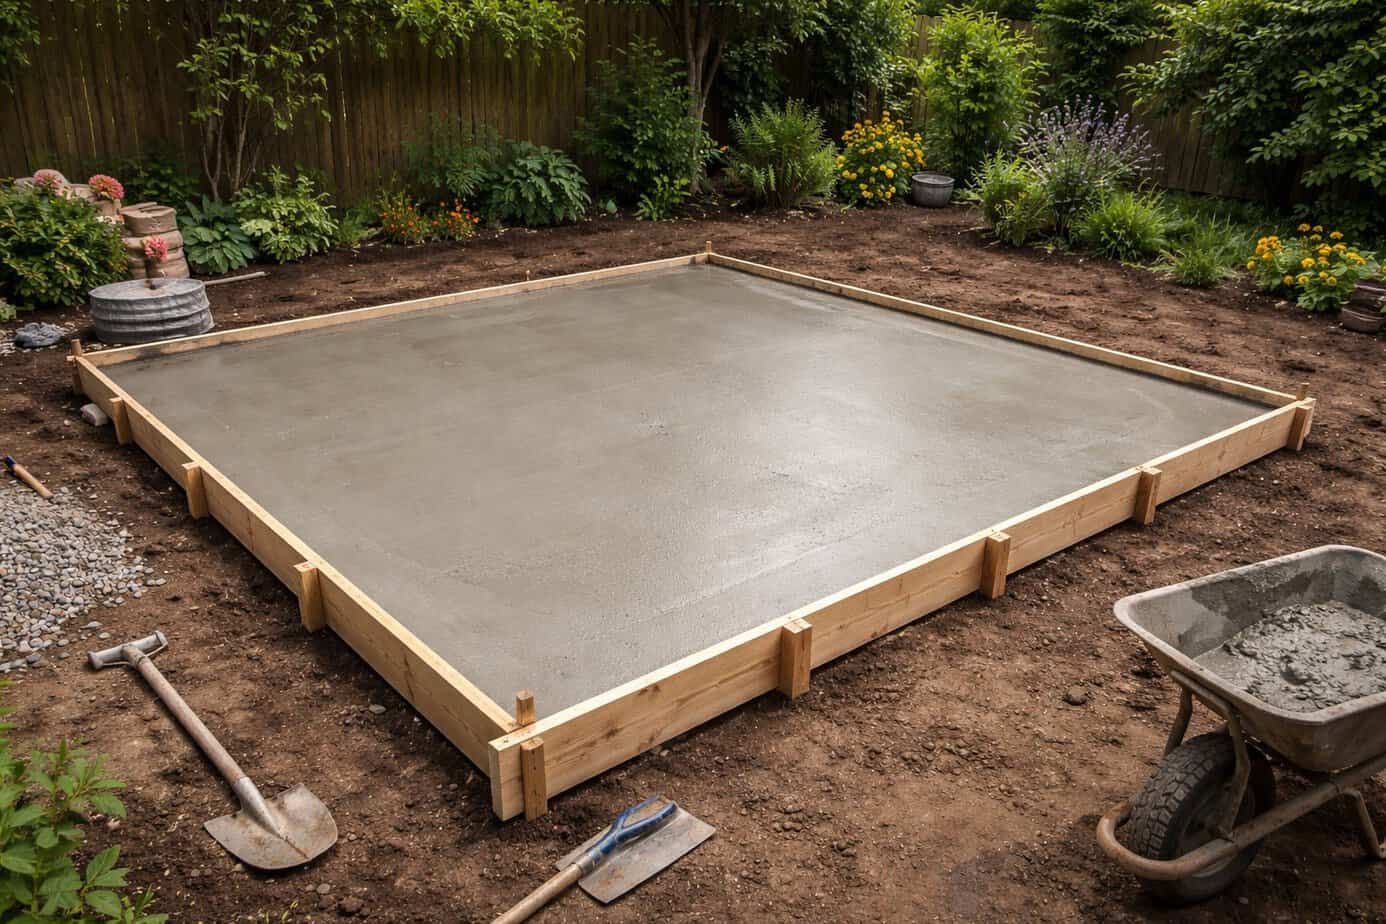
3. Build level timber formwork
The timber frame will contain and shape the concrete.
- Use straight, treated timber boards
- Set the height to your finished slab level (typically 100mm thick)
- Secure with stakes driven into the ground every 600 to 900mm
- Check the level across all sides using a spirit level
Take your time here. The formwork sets the level of the final surface. If it’s off, so is the slab.
4. Install DPM
Lay the damp proof membrane on top of the compacted hardcore (or blinding layer if used).
- Use 1200 gauge polythene minimum
- Overlap joints by at least 300mm
- Tape all joins to keep it continuous
- Run the membrane up the inside of the formwork edges
Do not skip this, nor damage the DPM, as this will cause long-term damp issues.
5. Mix concrete
If you’re mixing it yourself, the easiest method is to use “ballast” (a pre-mixed blend of sharp sand and gravel) rather than buying sand and stones separately. Use this standard mix ratio:
1 part cement : 5 parts ballast
(Note: If you are using separate materials, the ratio is 1 part cement : 2 parts sharp sand : 4 parts aggregate).
- Add water gradually
- Aim for a workable mix, not overly wet
- Mix thoroughly to avoid weak spots
Tip: Avoid overly wet mixes to prevent loss of strength and reduce the risk of cracking.
For ready-mix concrete, calculate the volume needed and follow the supplier’s instructions for pouring.
How to calculate concrete volume
Use this formula:
Length (m) × Width (m) × Depth (m) = Volume (m³)
For instance, 3m x 2.5m x 0.1m (100mm slab) = 0.75m³
Add 10% extra to allow for waste and uneven ground.
6. Pour and level the mix
Pour the concrete into the timber formwork you’ve just built.
- Start at one end and work across
- Use a shovel or rake to spread
- Compact using a tamper or by tapping along the formwork
Level the surface using a straight edge (screeding):
- Rest it on the formwork edges
- Move it back and forth in a sawing motion
- Fill low spots as you go
7. Tamping and finishing
Once level, tamp the surface to remove air pockets.
- Use a tamper or a length of timber
- Work across the entire slab
Finish with a float by smoothing the surface once the water has evaporated. A light brush finish can improve grip if needed.
8. Cure the concrete
You’re almost there! For this final step:
- Cover the slab with plastic sheeting immediately after finishing
- Keep it damp for at least 5 to 7 days
Do not walk on the slab for 24 to 48 hours and wait at least 7 days before you set up your summerhouse on top of it (even longer in cold weather). Maximum strength is reached by approximately 28 days, so heavier buildings might call for a longer wait.
While the concrete cures, there’s time to look for a summerhouse if you haven’t already. But we recommend getting the measurements of the unit you’re considering first to ensure it fits the base.
You’ll find our range includes standard models that suit most bases:
Order today, and it can be delivered in time, or sooner, depending on your zone.
Final Checks Before Installing Your Summerhouse
- ✓ Surface is fully set and hard
- ✓ No visible cracks or crumbling edges
- ✓ Level confirmed across all directions
- ✓ DPM edges are intact and not exposed
Other base types are available if you don’t have the time to wait for concrete to set. Read this guide next for options: How to Choose the Best Summer House Base


