Jump to:
So, how to paint a wooden shed without it looking patchy or flaking off in six months?
There’s more to getting it right than just throwing on a coat and hoping for the best. You’ll want to start in the right place and avoid the common mistakes. That’s all covered here.
Before You Begin Painting a Shed
Always check the weather forecast. Aim for a dry, mild day, ideally between 10 to 20°C with no rain for at least 24 hours. This ensures proper drying and means you’ll be more comfortable while doing the work. Also, wear old clothes and lay a dust sheet or tarp beneath the shed to catch drips.
Sand the surfaces before you begin, to remove any loose material and increase the timber’s ability to hold the paint.
If you’re repainting, and your shed is a dark colour to be replaced with a light colour, you’ll want the old paint completely removed so that it doesn’t show through.
Work from the Top Down

The roof edges and fascia boards are your starting points. The trick is to paint along the grain and brush in clean, steady lines to avoid leaving brush marks. A smaller brush will be your best friend, especially in tight areas.
When painting the joins or overhangs, dab off any excess so you won’t overload the brush. And remember not to overlook the underside. Go from one end to the other to keep from doubling back into wet paint.
Check for drips as you go, even more so under the lip of the fascia, because they’re easy to miss until they’ve dried. Once the top sections are done and dry, you’ll have a clean edge to work down from when you move on to the rest of the shed.
Expert tip: Apply a wood preservative or exterior wood primer before your top coat, especially if the wood is bare or untreated. This can extend the life of your shed’s paintwork.
Cut in Around the Edges and Windows
When you get near windows, take your time; the frames can be tricky to work with. Use masking tape along the corners, window frames, and along the base to protect the glazing.
Use a sash or angled brush when working close to the frame. This will give you a clean line without needing to press too hard. For any tight corners, twist the brush as you move to guide the bristles where you want them, but do so gently.
If any paint gets on the glass, wipe it off immediately with a damp cloth before it dries. Leave the tape on for now—you still have the wall panels to paint!
Quick fix: If dried paint ends up on the glazing, and your shed has glass windows, a razor scraper can help remove it cleanly. For plastic or styrene glazing, use a plastic scraper or soft cloth with warm soapy water to avoid scratching.
Move on to the Main Panels
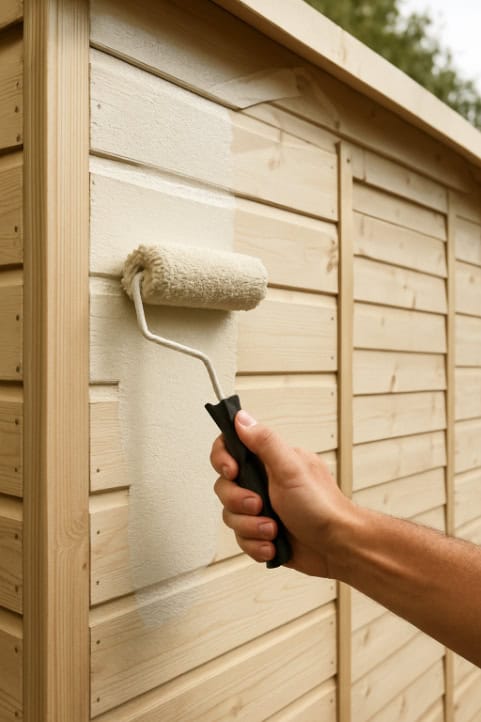
Next, head down to the walls, ideally using a roller. Load it with paint and roll vertically, working in sections about a metre wide. Don’t press too hard against the wood, or else it will pool or drip. Switch back to your brush for better control when you get to corners and edges.
One tip is to overlap each new section slightly while the paint is still wet. That makes the finish blend all over, and you don’t end up with patchy spots. Also, watch for any rough patches or knots in the wood. These might need a quick extra coat to cover thoroughly.
Overall, painting in this order helps you catch any drips as you go and saves time when fixing patches later.
Tip: Since you’re covering the entirety of the garden building, consider how many litres of paint you need.
Common Slip-Ups to Watch Out For
Even if you follow the steps, there are a few things that can catch you out, and all result in the hassle of redos.
First is overloading. This applies whether you use a brush or a roller. Too much paint will drip and run, making a mess and wasting time cleaning up. It’s better to build up thin, consistent coats.
Be careful about rushing. Painting around windows or tight spots needs a steady hand and patience. Otherwise, this leads to sloppy edges or paint on the glazing. The same goes for drying time between coats; too soon and it can mess up the colour.
Skipping the prep work, like cleaning or sanding, can cause the paint to peel sooner than you’d like. If dirt, dust, or old flaky paint is left on the wood, the new shed paint colour won’t stick as well as it should. Take a little extra time to give the surface a good clean and smooth it down.
If your brand new shed is pressure treated, you need to wait. A freshly pressure treated shed needs to dry first, and this process often hasn’t completed by the time it arrives at your house. 4-6 months is a standard waiting time, depending on the wetness of the season. Painting before the timber has dried out is a recipe for trouble as it prevents it from drying properly, and leads to unsightly blotches as bacteria grows under the paint — causing the very issues that pressure treatment is supposed to prevent!
How to Paint a Shed: The Best Brush to Use
A 4-inch brush is your go-to for the big flat panels. Pick up a one or 2-inch for edges, corners, and tricky spots around windows. The smaller the brush, the better the control is and the less splashing.
A small roller does the job on wider, smoother coverage; a bigger one works for large, flat sides of the shed. Again, just watch your pressure so the paint doesn’t pool or drip.
A dry brush, about the same size or a bit smaller than your regular one, is great for those rough spots in the wood. Use it to push paint into grooves and flatten out thick patches, which should help the finish last longer.
Rinse your brushes and rollers thoroughly between coats or at the end of the day, especially if using water-based paints. Leaving paint to dry in the bristles can ruin a brush. Store them flat or hanging to avoid damage to the bristles.
How to Choose the Right Paint for Your Shed
When choosing shed paint, consider three things: base type, finish, and colour.
If you want something easy to work with, go for water-based paint; it dries fast and cleans up with just water. Oil-based paints need more time to dry, but they last longer. Opt for outdoor or exterior wood to avoid peeling or fading after frost or under the sun.
As for the finish, satin gives off a soft, low-sheen that looks smooth and is easy to wipe clean. Gloss, in contrast, is shiny and smooth, so it stands out. Though you may need to be careful, it can show every brush mark on the wood.
Now what are your paint options, and how many litres do you need?
The Best Paint Colours for a Garden Shed
How Much Paint Do You Need for a Shed?
This is optional, but if the wood is new and bare, apply primer first. If it’s already painted, use exterior wood paint that matches the type of the old coat. For instance, water-based over water-based, or oil-based over oil-based. Some water-based paints can also go over old oil paint.
Congratulations, your wooden shed is all painted! Now it’s about keeping it in good shape. Here’s a guide to help with that: How to Maintain Your Shed Paint


