Jump to:
Do you need an air gap for shed insulation?
Yes – if you want to keep the temperature in your shed under control and allow the exterior wall to breathe, you need an air gap! Moisture build-up is a big issue when it comes to sheds, and can damage both the contents of your shed and the shed itself. An air gap will help to prevent moisture build-up whilst also retaining heat in winter.
An air gap creates a barrier between the insulation (or membrane) and the exterior of your building, which helps to keep moisture out. This is perfect if you’re storing any valuable items or perishables in your shed, as it will help to protect them from damage.
Note: The following shed insulation tips will also apply for summerhouses, garden workshops, garden storage units and log cabins.
What Are The Benefits Of Insulating Your Shed?
The majority of points outlined will be linked to moisture and its prevention, as well as temperature regulation.
Insulation:
- Keeps the heat in
- Keeps the shed dry
- Prevents moisture damage
- Allows the your shed to “breathe”
- Will help extend your shed’s usage life
Keeps the heat in
One benefit of keeping the heat in is that it will make the shed more comfortable to use in winter.
This can be important if you’re using it as a workspace, as you’ll be able to stay warm while you work. It can also help to protect any items that are stored in the shed from the cold.
This is particularly useful as common items like tools and electrics can be damaged by the cold weather.
Otherwise, when winter’s gone and you start taking out your tools again, they may not work as well as they should (or may even have stopped working completely!).
By insulating your shed, you can help to prevent this from happening, and ensure that your tools remain in good working order when you need them.
Keeps the shed dry
Keeping your shed dry is important for a number of reasons. Firstly, it will help to protect any items that are stored in the shed from moisture damage.
This is especially important if you’re storing anything made of wood, as excessive moisture can cause it to warp and become damaged.
Secondly, it will ensure water droplets and condensation doesn’t form on the inside of your shed. This can eventually lead to mould and mildew growth if left untreated.
Not only can this damage your shed, but it also poses a health risk, as mould spores can be harmful to breathe in. Condensation can be a particular problem with metal sheds, with the moisture building causing the metal to oxidise and rust.
Prevents moisture damage to insulation
As well as keeping the shed dry, an air gap will also help to prevent moisture damage. This is because it creates a barrier between the insulation and the exterior of your shed.
This will stop any moisture that does get in from reaching the insulation, which could cause it to become damaged.
Allows the exterior of your shed to breathe
Another benefit of an air gap is that it allows the exterior of your shed to breathe. This is important as it will help to prevent moisture build-up, which can damage both the shed and its contents.
Will help extend the life
By adding insulation to your shed, you’ll be helping to extend its life. This is because it will protect the shed from moisture and the elements, which can both cause damage over time.
Those who don’t insulate their sheds will likely find that they need to replace them more frequently. This not only costs money, but it’s also both time-consuming and inconvenient.
The Benefits of Having an Air Gap
The main benefit of having an air gap is that it helps to keep the temperature inside your shed stable.
This is especially useful in summer, as it’ll stop the heat from building up and making your shed unbearable to be in.
It also helps to protect your belongings from moisture damage, as it stops damp air from reaching them.
This is perfect for anyone who stores valuable or delicate items in their shed, as it will help to keep them in good condition.
Finally, it can also help to reduce noise pollution from outside your shed. This is perfect if you use your shed as a workspace, as it will create a peaceful environment for you to concentrate in.
How to Prepare to Insulate Your Shed
Like most things, preparation is key when it comes to insulation. You need to make sure you have the right materials and that your shed is clean and dry before you start.
Step 1 – Have a good clear out
This sounds obvious, but you need to make sure you have enough space to insulate your shed effectively.
This means having a good clear out and getting rid of any unnecessary items that are taking up space.
Not only will this give you more room to work in, but it will also help to keep the shed tidy and organised.
Once the insulation is in place, it’s going to be more difficult to move things around, so it’s best to do it now.
Step 2 – Give the shed a good clean
Yeah, we know… Who really wants to clean their shed? However, before you start insulating, you need to give the shed a good clean.
Any dirt or dust left on surfaces could end up trapped between the insulation and the cladding, which will make it more difficult to clean in the future.
Step 3 – Check for any damp or mould
This is an important step, as you need to make sure there’s no damp or mould present before you start your insulation.
If there is, it needs to be dealt with before you do anything else. Otherwise, you run the risk of trapping it between the insulation and the shed and making it worse.
To do this, you can either use a damp-proof course or a mould inhibitor. These can be applied to the affected areas before you begin insulation, which will help to prevent any further problems.
Step 4 – Get your materials ready
Once you’ve prepared the shed, it’s time to get your materials ready. You’ll need insulation, of course, but you also need something to fill the gaps with.
This is where an air gap comes in handy, as it will help to create a barrier between the insulation and the exterior of the shed.
You can buy air gaps from most DIY stores, or you can make your own using a piece of cardboard – just make sure it’s sturdy enough to withstand the weight of the insulation.
Step 5 – Start insulating
Now it’s time to start insulating…
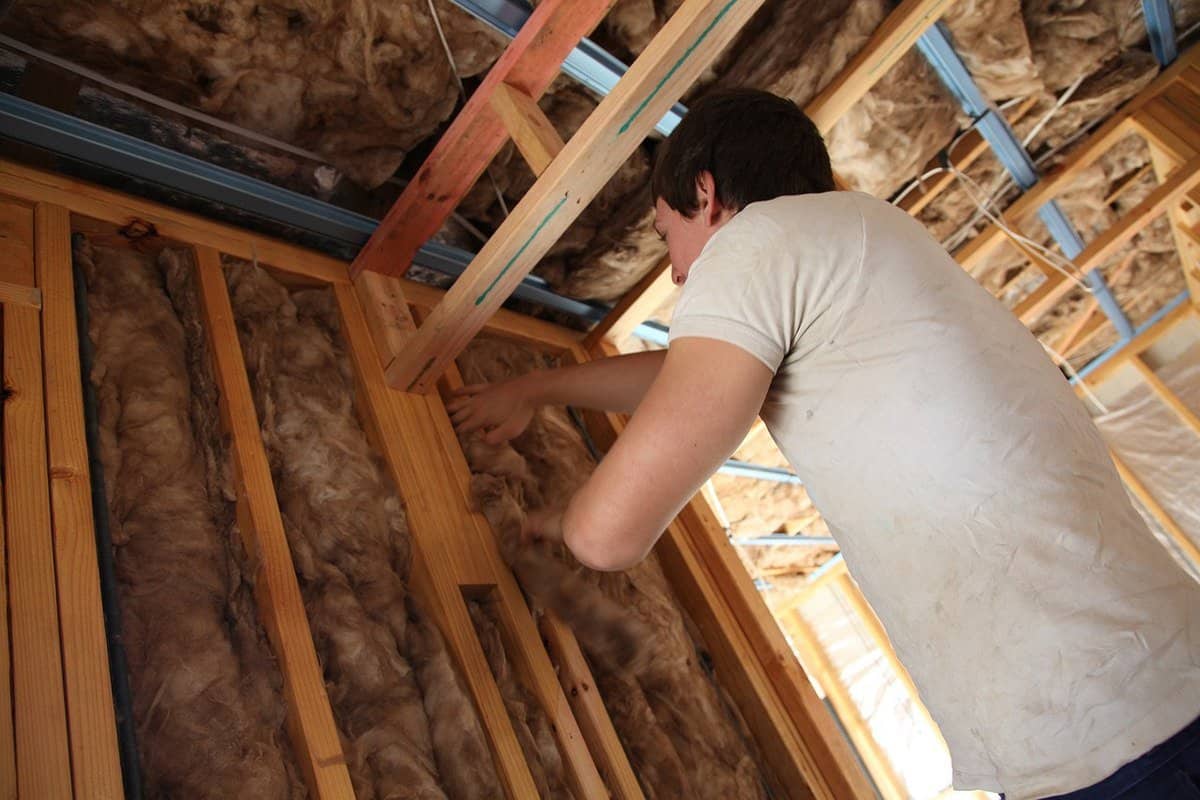
Begin by applying insulation to the floor, making sure to fill any gaps with the air gap. Then move onto the walls, again filling any gaps as you go.
Once you’ve done this, you can start on the ceiling. It’s important to make sure that the insulation is evenly distributed, as otherwise, it won’t be as effective.
Step 6 – Check for any gaps
Once the insulation has been completed, it’s time to check for any gaps – these can be tricky to spot, but they’re important to fill, as otherwise, you’re going to lose heat through them.
The best way to do this is to use a piece of cardboard or something similar. Slide it along the surface of the insulation, and if there’s a gap, you’ll feel it. Once you’ve found one, just fill it in with more insulation.
And that’s it! You’ve now successfully insulated your shed. Just sit back and enjoy the warmer temperatures inside.
How to Create an Air Gap?
There are a few different ways you can create an air gap in your shed.
Install baffles
One of the most popular methods is to use baffles. These are sheets of material that you install on the inside of your shed, and they create an empty space between the insulation and the exterior of your shed.
They ensure that there is proper airflow, and they also prevent any vents or openings from being blocked.
Material needed:
- Baffles
- Saw
- Screws or nails to affix
Installation instructions:
- Measure the inside of your shed so you know how many baffles (and of what size) you need.
- Cut the baffles to size, using a saw if necessary.
- Install the baffles on the inside of your shed, making sure they’re evenly spaced out. (You can use screws or nails to do this).
- Make sure there are no gaps between the baffles so that the air can flow freely.
Install a soffit vent
Another option is to install a soffit vent – this is a small opening that you create in the shed, and it allows air to flow in and out.
It’s important to make sure that the soffit vent is properly sealed, as otherwise, it could let moisture in.
Materials needed:
- Soffit vent
- Caulking
- Screws
Installation instructions:
- Measure the opening for the soffit vent and cut it to size.
- Install the soffit vent in the opening, using caulking to seal it (and any gaps) in place.
Rigid foam insulation
This type of insulation comes in sheets that you can cut it to size and fit it in your shed or summer house.
It’s important to make sure that the foam is properly sealed so that air can’t get through. You can use caulking or tape to do this.
Materials needed:
- Rigid foam insulation
- Caulking or tape
Installation instructions:
- Cut the foam insulation to size so that it fits snugly in your shed.
- Install the foam, using caulking or tape to seal any gaps.
- Double-check that there are no gaps or openings that air can get through.
Key Takeaways:
- Moisture is the main enemy of sheds, so it’s important to take steps to prevent it from causing damage.
- An air gap is important for shed insulation as it helps to keep the temperature inside stable and prevents moisture damage.
- There are a few different ways you can create an air gap, such as by using baffles or installing a soffit vent.
- Rigid foam insulation is another option, but it’s important to make sure that there are no gaps or openings that air can get through.
Bio
Des Dreckett is the head of content and co-founder of Outdoor Rumors, A website dedicated to helping households transition to sustainable energy by providing helpful information and resources.
FAQs
Is 25mm insulation enough for a shed?
Yes, 25mm insulation is enough for a shed. However, you may want to add more if you live in a particularly cold climate.
Can you buy shed insulation kits?
Yes, you can buy shed insulation kits in-store or online. These usually include rigid foam insulation and baffles, and they’re a great way to get everything you need in one purchase.
How do I stop my shed from sweating?
If your shed is sweating, it means that there is too much moisture inside. You can fix this by ensuring that there is adequate ventilation. You can also try using a dehumidifier, which will help to remove the excess moisture from the air.
Can I insulate my shed with bubble wrap?
Yes, you can insulate your shed with bubble wrap. However, it’s not as effective as other methods, such as rigid foam insulation. Bubble wrap is also not as durable, so it may not last as long.
Does a vapour barrier go over insulation?
Yes, a vapour barrier should be installed over the insulation. This will help to prevent moisture from passing through and damaging your belongings. Click here to find out where to place your vapour barrier.