Jump to:
A well-maintained shed roof is crucial for protecting your belongings from the elements. Over time, exposure to weather conditions can cause roofing felt to deteriorate. This often leads to leaks and potential damage, which you’ll want to avoid.
In this guide, we’ll walk you through the process of assessing your garden shed roof. Get tips and ideas when gathering the necessary materials and expertly re-felting them. Read on, and equip yourself with knowledge and confidence for a successful refurbishment.
Assess the Roof Condition
Imagine your shed’s roof as its protective umbrella. Over time, this “umbrella” can get worn out, leading to potential problems like leaks or damage. To prevent this, it’s like giving your umbrella a check-up. Look for tears, bald spots, or water damage – signs that it might not be doing its job properly. Before you start fixing it, think of safety first, such as making sure your ladder is stable. Use appropriate personal protective equipment (PPE), and be cautious of any weakened areas.
This careful check helps you spot issues early on. It also ensures that when you do fix it (or give it a new “skin”), your shed stays safe and dry for a long time.
Gather Materials and Tools
To re-felt your shed roof successfully, you’ll need the right materials and tools. Here’s a list to guide you:
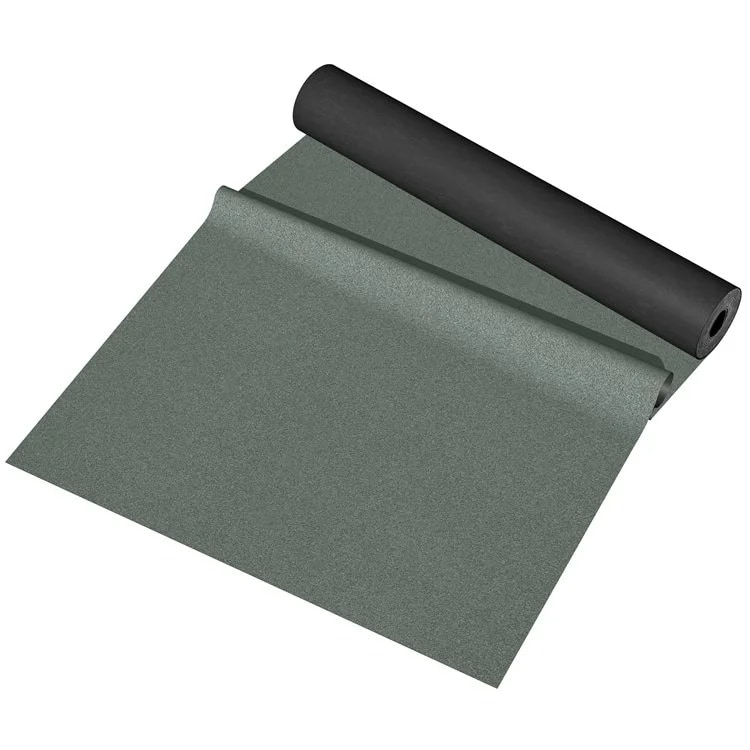
- Roofing felt: The star of the show, providing a protective layer against the elements. We recommend a green mineral felt for enhanced UV resistance.
- Roofing nails: Felt tacks secure the material to the roof, keeping it in place.
- Hammer: For driving in those roofing nails securely.
- Utility knife: Perfect for cutting and trimming the felt to fit your roof.
- Ladder: Ensures safe access to your shed roof.
- Chalk line: Helps create straight guidelines for accurate felt placement.
- Roofing adhesive: Ensures a strong bond between the felt and the roof.
- Dust mask and safety glasses: Protect yourself from dust and debris.
- Measuring tape: Ensures precise measurements for a snug fit.
- Plywood (if needed): For repairing any damaged or rotten wood on the roof.
Tip: Find these materials at your local hardware store or home improvement centre. Additionally, online retailers often offer convenient options for purchasing roofing materials. This makes the process smoother and ensures you have everything you need.
Prepare the Workspace
A clean and organised workspace sets the stage for a smooth re-felting process. It allows you to move freely, reducing the risk of accidents and making each step more manageable. Sweep away debris and check for any loose objects that could pose a tripping hazard.
So, before diving into re-felting, prepare your workspace for success. Start by clearing the area around the shed. Remove any items that might get in the way and create a clean, clutter-free zone. A tidy workspace ensures safety and efficiency during the project.
Don’t forget to shield surrounding vegetation and belongings. Lay down protective covers or tarps to prevent damage from falling debris. This extra step ensures that your garden remains unharmed. Ultimately, your belongings stay free from potential mishaps.
Take the time to prepare your workspace and outdoor shed for hassle-free re-felting.
Remove the Old Roofing Felt
Following these steps ensures a safe and effective transition from old to new:
Step 1: Safely remove the existing felt
- Begin by carefully lifting the edges of the old felt using a pry bar or utility knife.
- Work systematically, avoiding sudden movements to prevent accidents.
- Dispose of the old felt properly, considering environmental regulations in your area.
Step 2: Handle damaged or rotten wood
- Inspect the exposed roof surface for any damaged or rotten wood.
- If you encounter issues, replace the affected sections with new plywood.
- Ensure the roof’s structural integrity by addressing any underlying problems.
Step 3: Clean and smooth surface preparation
- After removing the old felt, thoroughly clean the roof surface of debris and nails.
- Use a stiff brush or power washer to eliminate dirt and remnants.
- Check for any protruding roof felt tacks and either remove or secure them.
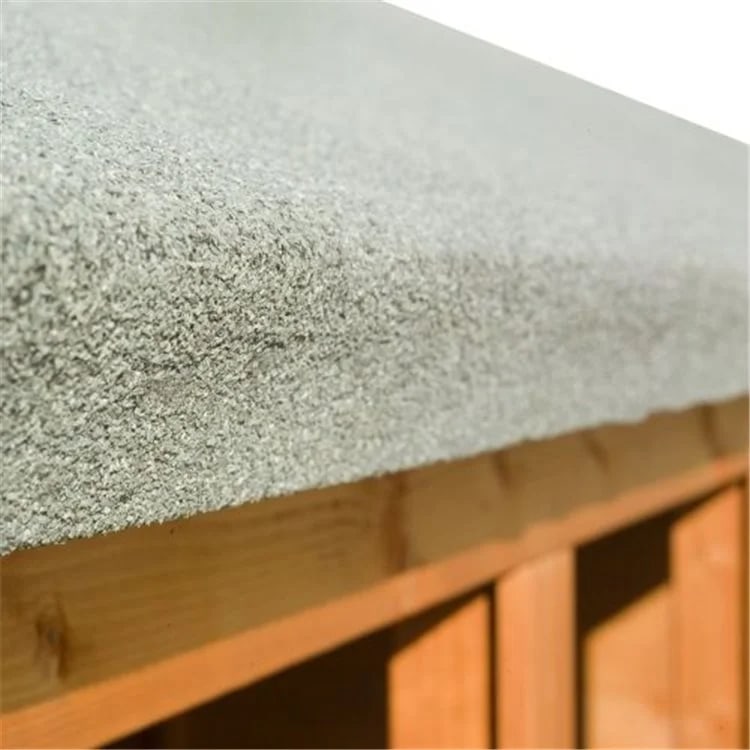
- The new felt adheres better to a clean and smooth surface, ensuring a tight and secure fit.
Repair and Prepare the Roof
It’s crucial to address any underlying issues before re-felting. Inspect the roof for potential problems such as leaks, rot, or structural issues. Identifying and fixing these ensures a more durable and long-lasting solution.
If you discover damaged wood or any issues, take the time to repair them before proceeding. Replace any rotted wood with new, treated plywood. Reinforce the structure if needed. Doing so ensures that your roof is sturdy and capable of supporting the new felt.
Achieving a flat and even surface is key to the success of your re-felting project. Use a straight edge or level to identify any uneven areas. Address these by adding shims or making necessary adjustments. A flat surface ensures a smooth appearance and enhances the performance of the new felt.
Install the New Roofing Felt
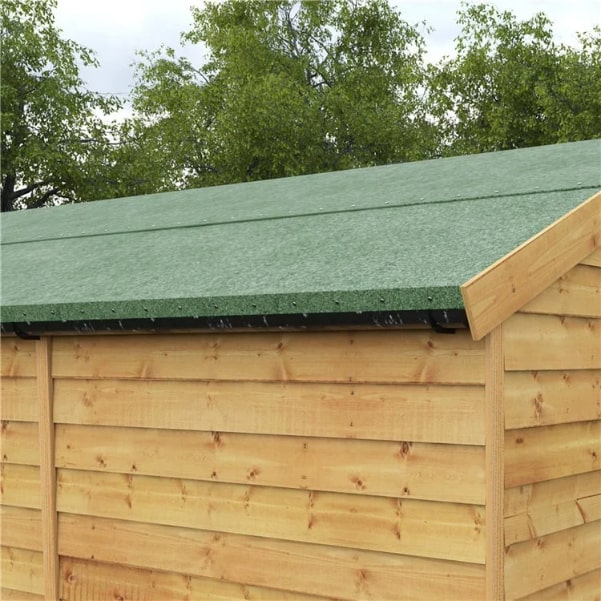
Begin by rolling out the new felt across the roof, ensuring it overlaps at the edges and between sheets. Work from one side to the other, smoothing out any wrinkles as you go. Use a staple gun to secure the felt, placing staples at regular intervals along the edges and seams.
Accurate measurement is crucial for a snug fit. Measure the length needed, allowing an extra inch or two for overlapping. Use a straightedge and a utility knife to cut the felt cleanly. When reaching corners or edges, cut at a 45-degree angle. This technique ensures seamless transitions and prevents excess material buildup.
To prevent future issues, securely attach the felt to the roof. Ensure edges are well-fastened with staples, especially in areas prone to wind exposure. Overlap seams adequately, applying roofing adhesive to enhance the bond.
Finishing Touches and Maintenance
As you near completion, trim any excess felt using a utility knife. Pay special attention to edges and corners, ensuring a neat and polished appearance. This step both enhances aesthetics and promotes the overall effectiveness of the re-felting.
Trimming excess material prevents potential issues. Ultimately, this gives your shed roof a professional finish. Use straight cuts and ensure the edges are securely fastened. Apply roofing adhesive to reinforce edges and corners. Doing so can offer extra protection against elements and extend the felt’s lifespan.
To maximise the new felt’s longevity, conduct regular roof inspections. Remove debris, such as leaves or branches, and clear any standing water. Promptly address any damage or signs of wear to prevent small issues from escalating.
Round-up
Congratulations on successfully re-felting your shed roof! With our guide, you’ve enhanced the protection of your belongings and extended your shed’s life. Remember to stay proactive with routine maintenance. Clear debris and address issues right away! A well-maintained roof ensures a dry and secure space for your items.
Take pride in your DIY accomplishment. And enjoy the peace of mind that comes with a sturdy and weather-resistant shed. If you ever need a roof refresh, you now have the skills to tackle it confidently.
Garden Buildings Direct offer a range of shed repair items, including a silicone and gun set.
Up next on your reading list: How to Felt a Corner Shed Roof


