Jump to:
If you want to waterproof a shed and protect it from damp, mould, and long-term damage, there are a few simple but essential steps to follow. Sheds are constantly exposed to the elements, and without proper waterproofing, water can seep in through the base, roof, or walls—ruining your tools, equipment, or garden furniture.
This guide covers six practical and budget-friendly ways to waterproof your shed, helping you extend its lifespan and keep everything inside safe and dry year-round.
1. Raise your wooden shed off the ground
If your shed is sitting straight on the ground, it’ll soak up moisture and invite damp and pests. The best thing is to raise it slightly. You can use a wooden base, floor bearers, or build a concrete shed base if the building is big and heavy.
Make sure there’s airflow underneath, as this will keep the timber dry and protect it from potential rot. You’ll also want to avoid placing it directly on paving, as water can pool there.
Tip: Before lifting, empty your shed so it’s lighter and easier to move. Get a mate to help, and use a crowbar to lift each side.
2. Gutter maintenance for a waterproof shed
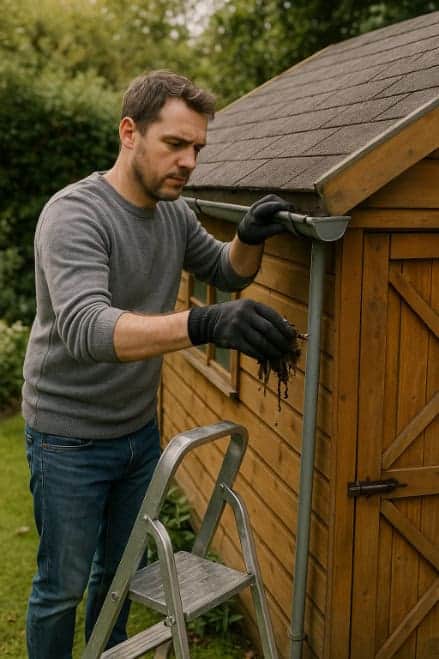
Blocked gutters cause water to spill over and soak the shed. Clear out leaves, mud, and anything else clogging them up. No gutters? Worth fitting some, as they help stop water damage and let you collect rainwater for the garden.
3. Check windows and doors
Look for gaps or cracks around the frames; timber shrinks over time and lets water in. Fill any gaps with a shed window sealant or expanding foam. For doors, use draught excluder tape. If you spot rot, dig it out, fill it with wood filler, then sand and repaint.
4. Inspect and repair the roof
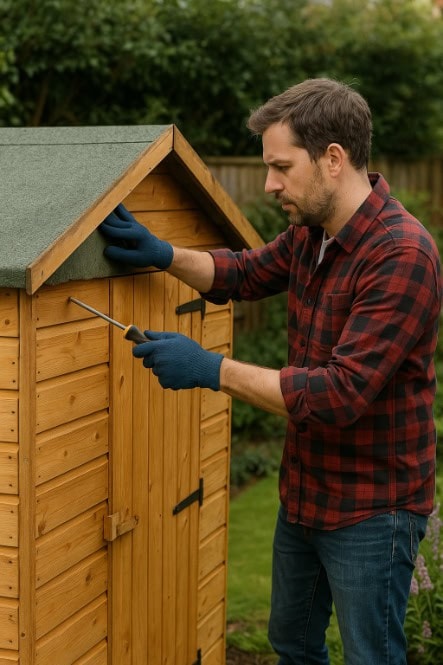
The roof takes the most damage, so check it often. Look for tears or worn felt, especially along the edges and ridge. Patch small rips with roof sealant and felt. If the felt is too far gone, replace it with new felt roof tiles, EPDM rubber, or a waterproof shed membrane.
5. Treat your wooden shed
Before applying the preservative, ensure there’s enough space around for good airflow. This helps keep it dry. Use a water-based stain or paint—it dries quickly and reduces moisture. These preservatives are also low in toxins, making them safer.
Tip: Apply the shed treatment evenly to protect the wood from rot and damage. Repeat the treatment every two years to maintain a waterproof garden storage solution.
6. Insulate and ventilate
Proper shed ventilation and insulation are key to keeping the structure moisture-free and helping to waterproof a shed from the inside out. Install vents on opposite walls to allow airflow, using bug-proof mesh to keep pests out. Wall or ridge vents are ideal, but even opening a window or propping the door open helps if ventilation options are limited.
When it comes to insulation, the goal is to regulate temperature and prevent condensation. For small sheds on a budget, expanded polystyrene (EPS) boards or foil-backed bubble wrap are great choices — both are lightweight, affordable, and easy to install. For long-term performance, PIR insulation boards offer superior thermal resistance, though they’re more expensive.
Whether you’re storing tools or using the space as a workshop, insulation keeps the contents protected from damp, frost, and extreme temperatures — a must-have when aiming to truly waterproof a shed.
Round-up
Getting a proper waterproof shed takes a bit of time and effort, but it’s worth it in the long run. It might seem like a lot at first, but you and your shed will benefit once it’s done. Hopefully, this guide gives you the nudge to set aside some time to care for your garden building!
For more shed-related tips, read this guide next: Building a Shed on Grass – Expert Shed Base Advice


