Jump to:
Cleaning a wooden shed comes down to two things: 1.) using the right products and tools, and 2.) knowing where to focus your efforts.
Timber can be sensitive to certain cleaners, and some tools can be too harsh on the surface. You won’t always need to clean the entire structure, though. There are usually four areas that need extra attention.
After 25+ years supplying garden buildings to UK homes, we’ve seen what works and what damages the timber long-term. The techniques below are the ones we keep recommending to customers when their sheds need a refresh. Use this guide to get started!
How to Clean Green Off a Wooden Shed
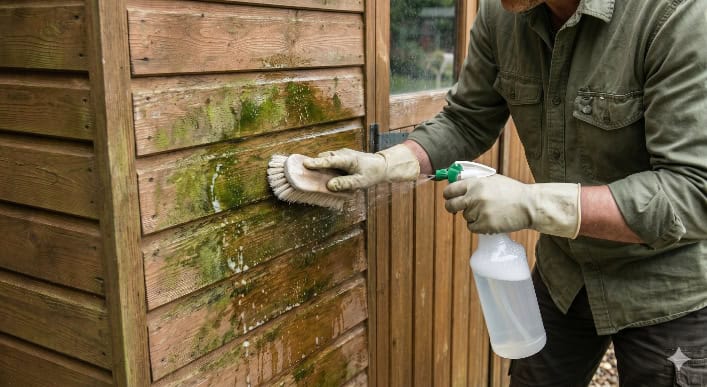
Use something gentle, such as a mix of water and white vinegar. A 50/50 mix in a garden sprayer is what we’ve seen customers get the best results from—concentrated enough to kill the algae and gentle enough not to lift the wood stain. The trick most people miss is timing: spray on a dry, overcast day, not in direct sun. The sun makes the vinegar evaporate before it can do its job, which is why customers who try this on a bright morning often tell us it “didn’t work”.
Avoid harsh chemicals like bleach, as they can damage the timber. A soft brush or sponge is enough to scrub most areas, including tougher patches. One thing we’ve picked up from customers: a stiff washing-up brush (the cheap supermarket kind) is better than a sponge for tongue-and-groove cladding because the bristles reach into the grooves where the green tends to settle. A sponge skims over them.
Note: The green layer is usually mould, mildew, or algae. It tends to appear in damp, shaded areas, most often on lower walls or sides that don’t get much sunlight. It can also show inside the shed if moisture levels are high.
When cleaning lower walls, avoid letting water pool near the shed base. Excess moisture can soak into the timber or foundation and lead to rot or structural issues over time. Shaded areas may need a little more attention, but keep pressure light to avoid wearing the wood surface.
How to Clean Mud Off a Wooden Shed
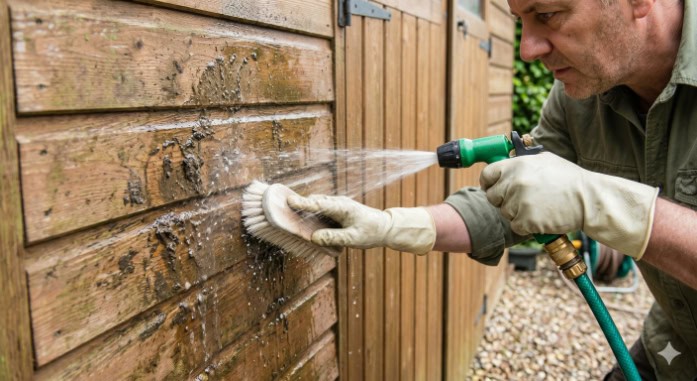
The lower exterior walls of a wooden shed are the most likely area to pick up mud. It happens when rain splashes soil up from the ground. The risk is higher if the structure sits near garden beds or paths, but regular cleaning helps.
Loosen the mud with a garden hose or a bucket of water. For tougher marks, soapy water or a diluted white vinegar mix both work well. Use a sponge to scrub the surface and lift the dirt. A trick we’ve picked up from customers who’ve done this a few times: rinse first, walk away for ten minutes, then scrub. Letting the water soak the mud gives you maybe 60% less elbow work than going straight in with the brush. The mud comes off in sheets rather than smearing.
Avoid using a pressure washer. It can strip the protective finish and, on pressure treated sheds, still force water into the timber surface.
Note: Mud forms when rainwater mixes with dirt or soil around the base of your shed. If the ground is a bit uneven or doesn’t drain well, water can splash dirt onto the walls. Left alone, it builds up and leaves staining that becomes harder to shift over time. The fix most customers settle on once they’ve cleaned the same wall twice: a 30cm strip of pea shingle or slate chips around the base. The stones break the rain’s fall before it can pick up soil, and the splashback line drops by half.
How to Clean Roof Felt
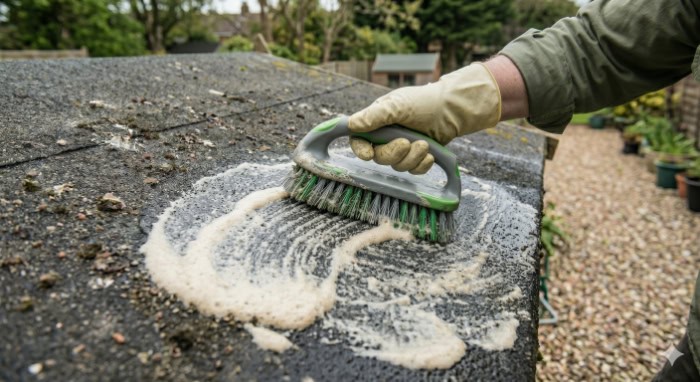
The good thing about quality felt roofing shingles is that they don’t need constant cleaning. However, over time, debris like leaves and moss can build up, especially with standard felt.
A simple water and baking soda mix works well. Use a soft cloth or mop with a long handle to wipe off dirt or moss without being too rough on the felt. Baking soda helps break down the build-up. Just wipe away the mess and rinse with water to keep it clean.
Two things customers tell us they wish they’d known sooner.
- First: Don’t stand on the felt to clean it. Even thick shingle layers will tear under body weight, and the punctures don’t show until the next downpour. Use a long-handled car-wash brush from a step ladder instead.
- Second: Time it right. Cleaning in early autumn before the leaves drop is a five-minute job; leaving it until November means clearing weeks of wet leaves first, which is when most of the felt damage actually happens.
Tip: Don’t use too much water when cleaning the roof felt. Excess moisture can seep into the shed, leading to mould or mildew on the interior walls, especially if it’s not well-ventilated. If you’re unsure about ventilation, have a look at some guides on ‘Shed Ventilation: How-to and Things to Consider’.
How to Clean Moss Off a Shed
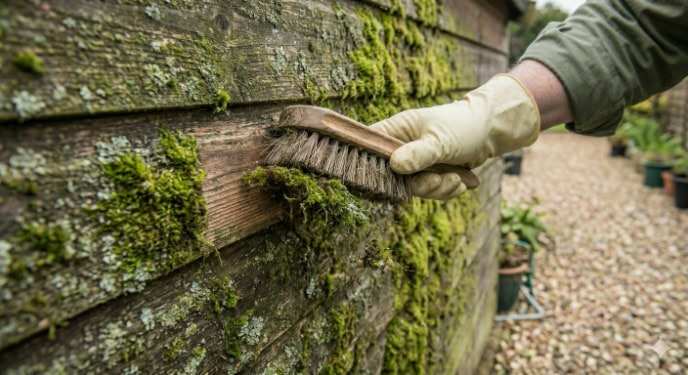
Moss shows up on shaded sides and roof edges. Left alone, it will rot the timber or degrade your roofing felt much faster than normal wear and tear.
Through our years of working on wooden garden buildings, we’ve found that a “less is more” approach works best. These steps below don’t require a pressure washer, which we don’t recommend, as it can cause more blow holes through the older felt.
- Dry brush to knock off the big clumps using a stiff-bristled hand brush. Doing this while the moss is dry prevents you from spreading green mud around.
- For any stubborn spots, use a scraper, such as an old credit card or a plastic putty knife, to get rid of them. These alternatives are thin enough to get into the gaps but won’t gouge the wood as a metal screwdriver would.
- Once the bulk is gone, spray the area with a 50/50 mix of white vinegar and water. This kills the remaining microscopic spores that a brush can’t reach. Let it sit for 15 minutes, then wipe it away.
If you have a persistent moss problem on the roof, one hack we’ve seen work is a small strip of copper tape along the ridge. When it rains, the copper ions wash down the roof, creating an unsuitable environment for moss.
Round-up
When cleaning your wooden garden storage, a soft brush and sponge are your best bet. DIY solutions like water and white vinegar or baking soda work a treat. Focus on the lower walls where green spots and mud tend to build up.
For moss, dry-brush before you wet anything, and consider a copper-tape strip along the ridge if it keeps coming back. As for the roof felt, keep it clear of debris and avoid using too much water, as it could seep through and affect the interior walls.
For more upkeep tips, here’s something worth checking out: How To Improve the Structure of Your Wooden Garden Shed
FAQ
How often should I be cleaning moss and algae off?
Check your wooden shed at least twice a year. Once in autumn, after the leaves fall and once in spring. If your shed is under a tree, you might need to do a quick brush-down every few months.
Will the vinegar from cleaning the shed kill my grass?
It can. If you’re using a vinegar solution near the base of the shed, avoid heavy runoff onto your lawn or nearby plants. Rinse the surrounding grass with plain water afterwards to dilute any stray vinegar.
What if the moss has already made the wood soft?
If the wood feels spongy when you press on it after the moss is removed, you’re likely looking at rot. Cleaning won’t fix that; you’ll need to let it dry completely and apply a wood hardener or replace the affected boards before re-treating the shed.


