Jump to:
Your wooden shed might need a door replacement, or perhaps you’d like to add an extra one on the side. If you’re taking the DIY route, this guide will walk you through the steps, from measuring and preparing tools to building. Ready?
Take Measurements
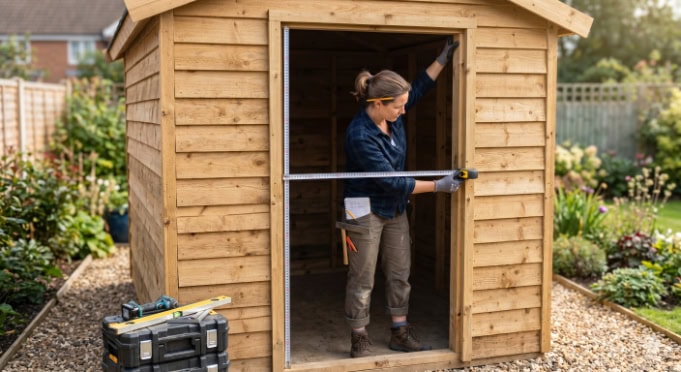
Measuring is the only way to ensure the door/s you’re building fit perfectly in your shed’s opening. It also helps if you wish to add an extra access point, giving you an idea of how small or big you can make it.
For existing openings, measure the width, height, door jamb’s thickness, and diagonals.
- To get the width, focus on these three points: the top, middle, and bottom, to account for any irregularities in the frame.
- Measure the height from the floor to the top of the frame and on both the left and right sides.
- Don’t forget the door jamb’s thickness, which is the frame into which the door fits. This is typically 35mm to 45mm, but check it to confirm.
- Next, take measurements of the diagonals of the opening. Start from the top left corner to the bottom right corner and from the top right corner to the bottom left corner. If the measurements match, the opening is square.
The numbers you get will determine the appropriate door size and ensure a snug fit. You can use the exact measurements for the extra door you’re making or adjust them slightly. Whether it’s a single or double door, it’s up to you, as long as your shed size can accommodate it. Make adjustments as necessary.
Tip: If you’re considering installing new flooring, factor in its height when measuring so the door opens smoothly.
Prepare Your Tools and Materials
Aside from your measurement tape, pencil, and notepad, here’s what you’ll be mainly needing:
- Wood: Go for a wood type that suits your budget and what you’re after. Plywood, solid wood boards, or composite materials are all solid choices. Plywood is affordable and easy to work with. Solid wood feels sturdy but needs more upkeep, while PVC is durable and low-maintenance, though it costs more. Consider how well the main shed can hold the weight of your door, as well.
- Screws: Make sure to pick corrosion-resistant screws that are the right length and thickness for a sturdy build.
- Hinges: Choose hinges that can handle the door’s weight and let it swing seamlessly. How many you’ll need depends on the size and weight of the door.
- Latch: Pick a latch that keeps the door securely shut. You can go simple with a barrel bolt or opt for something a bit fancier, like a locking mechanism. Pair it with sturdy shed padlocks, such as this padlock hasp, to amp up your shed’s security.
- Extras: Consider adding handles or weatherproofing sealants, depending on your need or preference. Sealants are especially handy for keeping out drafts and reducing heat loss.
Essential tools for the project include:
- Saw (circular saw or table saw)
- Drill
- Screwdriver
- Level
- Chisel
- Camps
- Safety goggles and gloves
Note: This is a general list, so feel free to add or remove items to suit your needs.
Build the Door
Start with the door frame. Here’s what you’ll need to do:
- Measure and cut the top, bottom, and side pieces to match the size of your shed door opening.
- Assemble the frame by attaching the sides to the top and bottom with screws or nails. The corners should be square, and the frame should be solid.
- Check the frame’s measurements and alignment. If anything’s off, tweak it to make sure it fits properly.
- For extra strength, add diagonal bracing or corner brackets at the joints.
- Fix the frame to the shed opening with hinges, but ensure everything is level and aligned before doing so.
Add the door panels
It’s time to put those panels up:
- Measure and mark the panel sizes to fit your door frame.
- Use a circular or table saw to cut them to the right size.
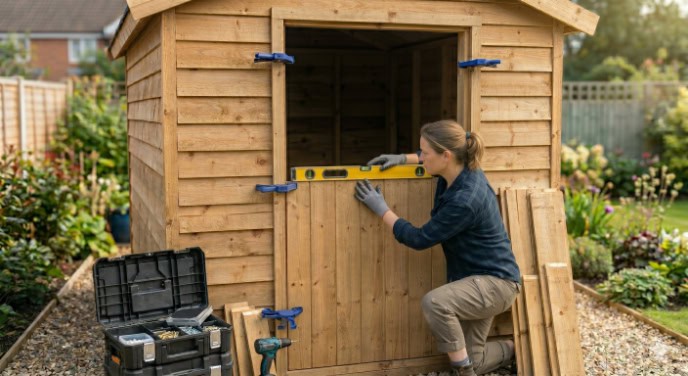
- Place the panels inside the frame and fix them with screws or nails.
- Grab a level to check the alignment both horizontally and vertically.
- Fix the panels to the frame, starting at the corners and working your way in.
- Add a few extra screws or nails around the edges and evenly across the panel to keep it sturdy.
Install the hinges and hardware
You’re almost done! Here’s how to sort the hinges for your shed’s door:
- Mark where the hinges will go on both the door and the frame. The hinge leaves should sit flush with the edges.
- Pre-drill some pilot holes for the screws to avoid splitting the wood.
- Line up the hinge leaves with your marks and screw them in place.
- Finally, hang the door by fixing the hinges to the shed frame where you’ve marked.
Congratulations—you’ve just built a door for your shed (or maybe even more than one)! You can follow these steps exactly or make a few tweaks to match your ideas.
If you’re working on a new shed and you feel like building from scratch is too much, take a look at our self-assembly wooden sheds. Doors come pre-assembled, making installation more straightforward:
Shop Self-Assembly Wooden Sheds
FAQ
How much gap should I leave around a shed door?
You should leave a 2mm to 5mm gap (about the thickness of a pound coin) on the top and sides of the door. Wood naturally expands and contracts with humidity and temperature changes. Without this, your door may stick or refuse to close during damp winter months.
What are the best hinges for a heavy wooden shed door?
T-hinges (also known as Tee hinges) are the gold standard. Their long arm feature distributes the door’s weight across the horizontal braces.
If you’re building a heavy-duty door using solid timber, use at least three hinges: one at the top, one at the bottom, and one in the centre.
Can I use plywood for an exterior shed door?
Yes, but you must use Marine-grade or Exterior-grade (WBP) plywood. They’re manufactured with water-resistant adhesives and a denser construction that allows them to withstand exposure to moisture and changes in temperature. Prime and seal the edges thoroughly to prevent water ingress.


