Building a shed? Before you get started, it’s a good idea to have a checklist to make sure nothing gets missed. But in this guide, we’ll focus on the roof.
This guide walks you through steps and tips so it stands up to the weather year-round (and your efforts won’t be wasted).
How to Build a Shed Roof
We’ll break these steps for shed roof assembly into five manageable parts, starting with:
1. Position the roof purlins as needed
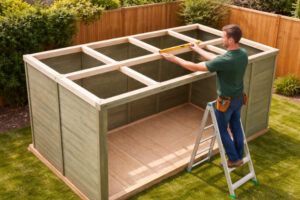
Roof purlins, also called roof bearers, must be fitted with no gaps. Check that these horizontal timbers run in the right direction for your roof type.
- On an apex roof, they usually run front to back, across the width of the shed.
- On a pent roof, they often run side to side, depending on the slope.
Purlins support the roof panels or boards. If they’re off, the rest of the roof won’t line up or hold steady. Make sure each is:
- Evenly spaced with no large gaps that could cause sagging or weak spots.
- Level across the top, where the roofing sits flat. Use a spirit level to check.
- Fixed to the top of the frame using screws, not nails.
2. Install the roof panels or boards
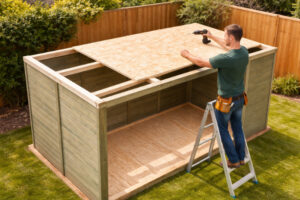
- Fix your panels or boards in place, starting from the lowest edge or back of the shed. Line them up one by one across the roof frame.
- Keep each panel flush against the next. Gaps will let in water or lead to movement over time. If using tongue-and-groove boards, slot each one in fully before fixing.
- Secure them into the purlins. Use screws or nails spaced evenly across each board, not just in the corners. Check your shed kit for fixing guides if needed.
- If using overlapping boards or a feather edge, overlap each one by at least 20 to 30mm to help shed rain. Make sure the run stays straight as you go.
Before you move on, check everything is solid and level. Loose boards or uneven sections will cause trouble when you fit the felt.
3. Add the felt (how to install shed roof felt)
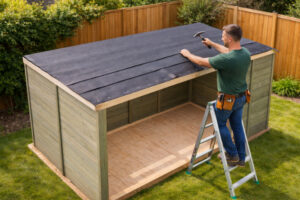
Roof felt keeps water out and protects the roof boards from rot. It needs to be laid right, or it won’t do its job. Go through it like this:
- Unroll the felt and leave it flat for 10 to 15 minutes. This stops it from curling when you lay it down.
- Start fitting at the lowest edge of the roof. Lay the first strip so it overhangs the edge slightly – about 40 to 50mm.
- Each new strip should overlap the one below it by at least 50mm. This overlap is what stops rain from working its way underneath.
- Fix the felt using galvanised felt nails or roofing tacks. Work from the middle outwards and smooth it as you go to avoid bumps or trapped air. Nail along the top edge first, then add extra fixings along the overlap and ends.
Finish at the top ridge with a final strip that runs along the peak and covers both sides.
4. Seal the edges and ridges
Seal any gaps where water could get in, including the joins, edges, and the ridge. Don’t leave this part out:
- Add extra nails or roofing adhesive along the overlaps. Pay attention to spots where one strip covers another, as these can lift if not secured well.
- At the ridge, fit one final strip of felt to bridge the gap. It should run the full length and cover both slopes. This is your main barrier against rain getting through the top join.
- Secure this ridge strip with nails along both edges, spaced out. If you’re using adhesive, apply a continuous bead under both sides before pressing it down.
- Check all corners and edges. Press and fix them in place so nothing lifts or flaps in bad weather. If your shed has fascia boards, fit them now to cover and tidy up the overhanging felt.
5. Check for gaps
Give everything one last look. There shouldn’t be any open gaps between boards or felt strips. Press down any raised felt and add extra nails where needed. Also, see to it that the rainwater runs off cleanly, and not towards the joints or drips.
Give everything a good check once it’s on. If it pools anywhere, check for sagging or misaligned boards. Make sure nothing wobbles and all the edges are sealed overall.
Things to Consider When Putting a Shed Roof Together
You’ve built the base, put the walls up, and now you’re onto the near end of the main build. But before we dive into the steps, there are a few things worth keeping in mind, including:
How do I choose the right shed roof style?
The roof you pick depends on where your shed is, the amount of rain it gets, and how much upkeep you want. You have three common options:
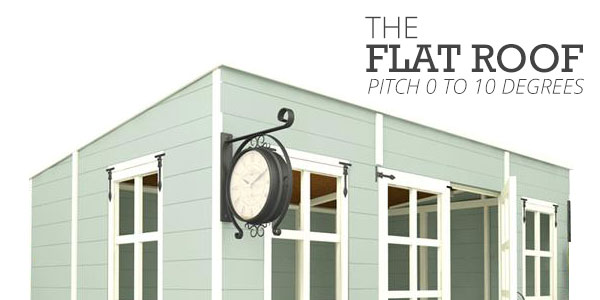
- Flat roof: This style has a pitch of 0 to 10 degrees, featuring a pent design with a small front overhang. It’s the simplest to put up and won’t cost much. Though it’d require more frequent maintenance to prevent leaking.
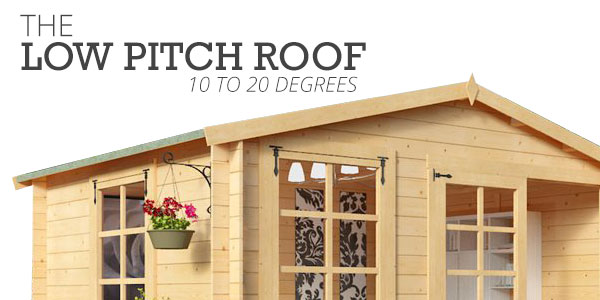
- Low-pitch roof: Sloped at 10 to 20 degrees, rain and snow run off more easily. It’s still pretty straightforward to build, but feels a bit sturdier than a flat roof.
- Pitched roof: This is the common style we see on an apex roof, with a central ridge peak. It’s sloped at 20 degrees or higher, and it handles heavy rain and snow really well. It does take a little more work to build, but it gives a solid, long-lasting roof.
Your shed roof needs to withstand rain and wind and match the size and shape of your shed.
How do I make my shed roof waterproof?
Nothing ruins a shed faster than a leak; thus, keeping it dry is what matters most. The roofing material plays a big role here. Felt, shingles, tiles, and waterproof membranes all work.
Each layer must overlap the one below without leaving gaps at the corners or edges. (We’ll go into more detail on this later.)
It might feel a bit fiddly at first, but a well-sealed roof ensures your shed stays dry all year. Plus, you won’t have to patch it every winter.
What roof covering and materials should I use?
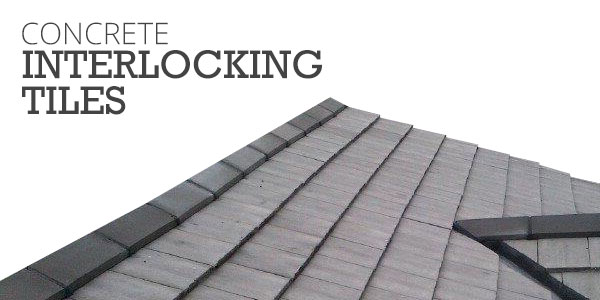
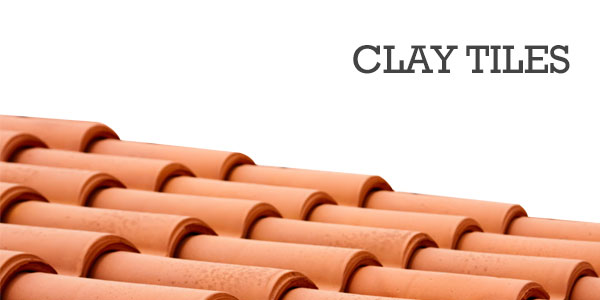
For a strong and long-lasting option, concrete or clay tiles are your best bet. They’re heavy, though, so make sure your frame is sturdy enough. Extra support is likely needed as well.
Asphalt shingles are lighter and easier to handle. They don’t last as long as tiles, but you can install them yourself with little hassle. A mineral felt roof, in contrast, is the simplest option. It’s light, does the job of keeping water out, and is easy to replace if it wears out.
How much should I budget for a shed roof?
The cost comes down mostly to the materials. Here’s a rough idea of what you might spend:
- Mineral felt: £50 to £150 – cheap and lightweight, but it won’t last as long as some other options.
- Asphalt shingles: £80 to £200 – easy to fit yourself, fairly durable, and come in different colours.
- EPDM rubber roofing: £120 to £250 – more expensive upfront than felt, but it’s incredibly durable and can last up to 50 years. It’s usually supplied in one seamless sheet, making it highly leak-proof and an excellent choice for flat or pent roofs.
- Concrete interlocking tiles: £150 to £300 – heavier and more solid; will last for years but require a strong roof frame. Reinforcement may be needed.
- Clay tiles: £200+ – expensive and heavy, but very durable and give a classic look. Again, these may require reinforcement of the roof.
Keep in mind, these are just the materials. Tools, fixings, and any help you hire will add to the total.
Tip: Set your budget before you start buying anything. This helps stop you from overspending halfway through the project.
Should I use rafters or trusses for my shed roof?
Rafters are straightforward: you cut them to size and fix them to the walls. They’re easy to adjust as you go and work well for small sheds, but each one needs to be lined up carefully, or the roof won’t sit right.
Trusses arrive pre-assembled. They’re strong and save time on wider sheds because you don’t have to measure and cut every piece. The trade-off is that they’re heavier, and you’ll likely need help to lift and secure them safely.
For a small shed, rafters let you work at your own pace. For a bigger shed, trusses get the job done faster, as long as you have the space and the muscle to handle them.
Is It Worth the Hassle?
Yes, especially if you’re doing it yourself. Roofs are part of building a shed anyway! By the time you’re at this stage, you can see it coming together. Without it, all the walls, floor, and effort you’ve already done are at risk from rain, wind, and damp.
If the idea of cutting, measuring, and fixing all the rafters feels like too much, a prefab shed kit can take the stress out of this step. Many kits come with the roof pre-cut or pre-assembled. You still get the satisfaction of building it yourself, but with far less hassle.
Browse some quality options below:
Round-up
That’s it—your shed roof is done. All that measuring, cutting, and fixing is behind you, and now the shed is almost ready to do its job. You can then start using it for tools, outdoor items, or whatever you’ve been meaning to store.
Looking for more shed designs?
FAQ
Can I roof a shed myself?
Yes, you can. To do so, you’ll need to source the tools and materials yourself. Provided you already have them, the general steps above are a good starting point. If the structure is bigger, getting a friend to help is a good idea.
Do I need planning permission for a shed roof?
No. A roof replacement or installation falls under permitted development rules, as long as the shed is under 2.5m high and not in front of your house. Even so, councils can differ, and there may be restrictions if you’re in a conservation area or the shed is bigger.
When in doubt, check your local council’s planning guidance to be on the safe side.
How long does a shed roof last?
Mineral felt tends to last 5 to 10 years, and will need replacing sooner. Asphalt shingles are a step up, typically lasting 15 to 25 years. Concrete or clay tiles can go 30 years or more, but they’re heavier and need a strong frame underneath.
Consider the UK weather. Regular rain and occasional storms can shorten a roof’s lifespan if it isn’t installed the right way.
Can I add insulation to a shed roof?
Yes. Adding insulation between the rafters is straightforward. Doing so also makes a big difference if you’re planning to spend time in the shed or store sensitive items.
Rigid foam boards or rolls of insulation are great. Lining them with a breathable membrane further helps prevent condensation.
Thinking of insulating the whole shed?