Looking to weatherise your garden shed to create a cosy annexe office or a garden room for the family? Perhaps you want a temperature-controlled storage space? Either way, insulating the floor is a good place to start.
Insulating a garden shed floor isn’t hard. However, the project does require different steps and tools depending on the situation. Here, we’ll go through the different ways to insulate a shed floor, including the factors to consider.
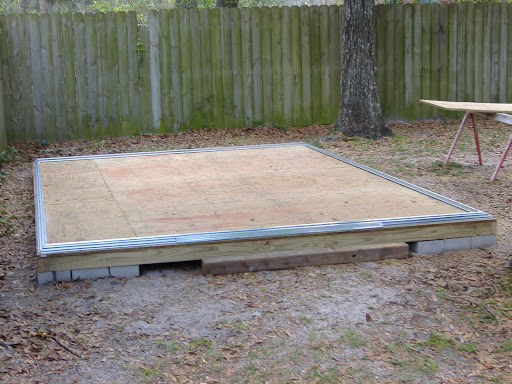
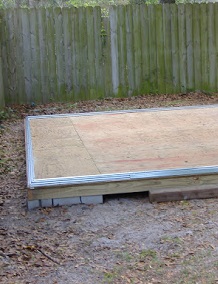
Image Credit: “Shed Floor” by nfspw is licensed under CC BY-SA 2.0
What Is the Shed Situation
Always prepare for what kind of shed you’re dealing with by asking these questions first:
Is the shed already built?
If your shed is already standing, the steps will differ from those for planning or building it. A new shed can have insulation added as you go. With an existing shed, you’ll need to lift the floorboards or add a layer of chipboard over the insulation.
What is the shed’s structure?
Is it a simple wooden frame, or does it have thicker walls and panels? Most standard wooden sheds benefit from insulation. Meanwhile, sturdier or more expensive sheds might already handle the weather better, but that’s not guaranteed.
What is the foundation type?
The foundation affects how you can add insulation. For instance, a shed resting on a concrete slab will need to be lifted off the foundation or have the floorboards torn out to insulate. If that’s the case, this guide might help:
How to Remove a Concrete Shed Base
In contrast, a raised wooden foundation is easier; you can slide insulation underneath.
Shed Floor Insulation Options
There are plenty of ways to insulate a shed floor these days. The right choice depends on the material, price, and how well it retains heat – a.k.a. its R-value. Your local home improvement centre will usually carry some variation of these options:
Fibreglass or mineral wool
Fibreglass is cheap and easy to work with, with an R-value of around R3 to R3.5, depending on the product. It doesn’t like moisture, though, and can go mouldy if it gets wet. If you use it, make sure it has a plastic or foil facing to keep moisture out.
Mineral wool comes in rolls or batts, just like fibreglass, and is easier on the skin (and it’s not as itchy). But it can sag over time, leave small gaps in the joists, and doesn’t handle damp conditions well.
Note: The higher the R-value, the better the insulation. An R3 value resists heat flow enough, giving a thermal resistance of 3 m²·K/W.
Rigid foam
Rigid foam comes in sheets, a bit like thick styrofoam, and is easy to cut to size. It keeps its shape over time, doesn’t sag like fibreglass, and handles moisture well. The downside is that it’s trickier to fit between joists and costs more than fibreglass.
Spray foam
Spray foam insulation is exceptionally effective and gives the best insulation because it fills every gap. It’s strong and long-lasting, but it’s expensive. You also need a solid surface for it to stick to. So, with an existing shed, you usually have to lift or remove the floorboards to use it.
DIY and temporary options
In a pinch or on a tight budget? You can lay a plastic sheet over the shed floor and throw a carpet, rug, or some old blankets on top. It’s not the most stylish solution, but it will give a bit of extra warmth until you can install proper insulation.
How to Insulate a Shed Floor
This is a general guide. Keep in mind, though, that any modifications made could affect the guarantee, including those garden rooms purchased from us. This shouldn’t stop you from making small changes, such as insulating the shed floor, as long as you plan carefully and carry out the work the right way.
What you’ll need:
- Straight-edge or ruler
- Utility knife or fine-toothed saw
- Safety glasses and gloves
- Insulation (batt, rigid foam, or spray foam)
- Vapour barrier or underlayment (for batt/roll insulation)
- Expanding foam or caulk
- Pry bar (for lifting floorboards, if needed)
How to prepare the shed floor
- Clear the shed and remove everything so you have space to work.
- Check your floor type, as each can have a different shed floor insulation process: a.) Raised floor: Lift up the floorboards to give access to the joists. b.) Concrete slab or ground-level floor: Lay rigid foam insulation on the slab, then cover it with chipboard or plywood.
How to support the insulation
- For batt or roll insulation, you’ll need wooden blocks or netting between joists to stop the material sagging over time.
- Rigid foam or spray foam doesn’t need support; it holds its shape.
Measuring and cutting
- Measure the space between your joists. Shed joists are usually 150 to 600mm apart.
- Cut your insulation and underlayment to fit between the joists. Precise cuts mean better insulation.
How to install the insulation
- Lay down a vapour barrier or underlayment first (for batt or roll insulation).
- Fit the insulation between the joists. For batt insulation, place it over the wooden support blocks so it stays in place.
- Seal any gaps or cracks with expanding foam or caulk to prevent drafts.
To reinstall the floorboards, put them back once the insulation is fitted.
Alternatives to tearing up floorboards
- Layer insulation on top of joists: Works with rigid foam, not batt insulation. You may need to add wooden support and adjust door frames.
- False flooring over rigid foam: Add a layer of insulation plus chipboard on top of the existing floor. Quick and DIY-friendly, though you might lose a little headroom and need to tweak doors and trim.
Round-up
Insulating the shed floor doesn’t have to be complicated. Measure the space and cut the insulation to fit. Choosing a higher R-value will give the best results and keep the floor performing for years.
Hopefully, this guide gives you a head start and saves you from any cold toes or soggy floors.
Another factor that’s worth considering: Does an Insulated Shed Need Ventilation