Jump to:
Does your shed get too cold in the winter and too hot in the summer? If yes, there’s one possible solution: insulation.
This guide is for those who want to insulate a garden shed DIY. It provides the basic information you need and a step-by-step guide to help you get started. You can also take a look through our accompanying video guide.
Do You Need to Insulate Your Shed? What to Consider?
Not all garden sheds are made equal. Before anything else, consider the condition of your structure. If it’s in poor shape, investing in a new one with a good base is wiser than insulating. It’ll save you time, effort, and money in the long run.
For instance, a log cabin with 28mm or 44mm cladding naturally provides better insulation than a standard utility shed. Thicker frames are crucial, as they can carry the extra weight of the insulation and endure nail hammering well.
Critical Steps Before You Start Insulating
Before you buy materials or start taking apart your shed, you need to prepare the space to ensure your insulation actually works:
Locate gaps in the wall: The crevices and cracks of an older shed may have areas of poor sealing. Take a feather or a strip of paper on a windy day, hold it near the walls, and see if there’s a draft.
Check for moisture problems: Insulation is useless if it gets wet. Ensure that any leaking areas have a layer of waterproofing or are repaired before adding insulation.
Verify measurements: Adding insulation reduces the internal height and width of your shed. Ensure you know your desired depth and how it will impact your usable space before you begin framing.
Gather safety supplies: Whenever you work with insulation (especially fibreglass), wear a pair of safety glasses, a filtering mask, and work gloves.
How to Insulate a Garden Shed
Insulating a shed can be straightforward and cost-effective, provided you do it right. Depending on how well you want it insulated, there are various ways to do so. We’re talking about the different parts of the garden building. Let’s start with:
Shed floor
When building a shed from the ground up, insulating the floor is crucial to prevent heat loss. This could save up to 40% of the heat that might otherwise escape. Here’s what you’ll need and how to do it:
Materials
- Wood blocks (at least two): These are used to provide support and elevation under the shed’s floor joist.
- A saw (handheld jigsaw or table saw): For cutting wood and other materials. A jigsaw is ideal for making curved or intricate cuts. A table saw is suitable for making straight and precise cuts.
- PIR insulation boards: These boards are employed to insulate the shed’s floor. It’s a rigid foam that helps retain heat and improve energy efficiency.
- Tape measure: For accurately measuring materials and ensuring they fit properly during construction.
Instructions
- Prepare the wooden blocks by measuring and cutting them. Ensure the dimensions match the size of the space under each joist cavity.
- Position at least two wooden blocks beneath each joist to provide adequate support.
- Cut the PIR foam boards to the appropriate size so they fit snugly between the joists.
- Check carefully to make sure the insulation is level with the top of the joists.
- Proceed with the installation of the flooring once the insulation is in place.
While laying underfloor insulation can be more costly, it’s highly effective. Alternatively, consider installing a ‘false floor’ for a less expensive and time-consuming method. This is especially suitable for existing shed floors. Start by gathering the following:
Materials
- Breathable membrane: It protects against condensation buildup and keeps the interior dry. Its vapour-permeable property makes it a standout choice as an insulation material.
- A thin layer of plywood or a carpet roll: Covering material used to provide extra insulation.
- Good-quality sealant: This is optional, such as if you use plywood/OSB board. A sealant is applied to fill any gaps and prevent air leakage. Learn about air gap insulation for more information.
- Tape measure: Ensures insulation materials and coverings are cut to the correct size.
- Heavy-duty scissors: Used to cut insulation materials, coverings, and sealants to size.
- Jigsaw: Used to cut insulation materials to fit around obstacles and corners.
Instructions
- Measure the dimensions of the shed floor and trim the breathable membrane accordingly.
- Place the breathable membrane evenly across the shed floor, ensuring full coverage.
- Add a thin layer of plywood or carpet over the membrane to provide extra insulation.
- Apply sealant to any openings or seams if plywood is used. Ensure a tight seal for optimal insulation.
Tip: Consider plywood for the ‘false floor’ method if you can invest extra time and cost. It provides better stability and insulation protection.
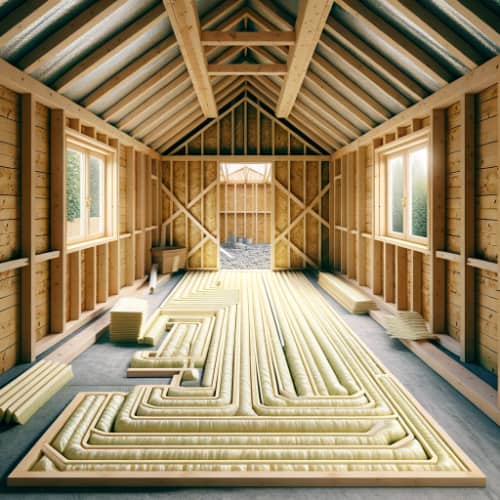
Shed wall and roof
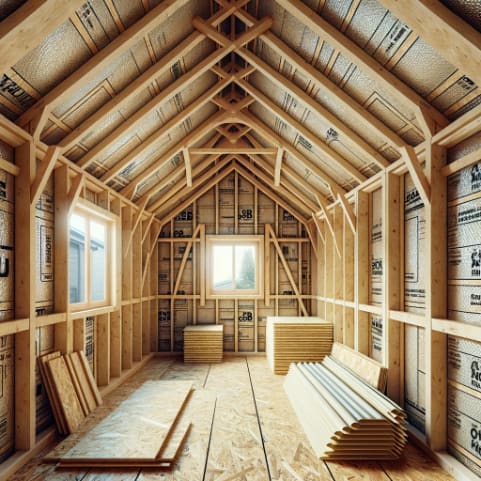
Shed wall and roof insulation are pretty similar, but we’ll give you two ways to do so. Let’s start with the inexpensive method — here’s what you’ll need and how to do it:
Materials
- Bubble wrap: A plastic material with small air bubbles trapped between two layers. It traps air inside its bubbles, which helps prevent heat loss.
- Staple gun: A tool that drives metal staples into materials such as wood or fabric.
- Jigsaw: Used for cutting curves and irregular shapes in various materials.
- Sheet of OSB board: A type of wood made from strands of wood pressed together with adhesive. It’s strong, durable, and moisture-resistant and an excellent insulator.
- Tape measure: Used to measure distances accurately in various construction and DIY projects.
- Nail gun: A power tool that drives nails into wood or other materials. It’s faster and more efficient than using a hammer and nails manually
Instructions
- Check the space between the wall panels to know how much bubble wrap you’ll need.
- Cut the bubble wrap to match the measured space between the panels.
- Make sure to layer the bubble wrap strips over each other to trap heat effectively.
- Use a staple gun to attach the bubble wrap securely to the shed walls.
- Measure and cut the OSB board to fit over each panel.
- Position the OSB board over the panels and use a nail gun to fasten it in place securely.
For the most effective way to do so (but more expensive), take note of the following:
Materials
- Fibreglass wool: A type of insulation material made from fine glass fibres. It traps air pockets, which helps to reduce heat loss and improve energy efficiency.
- Breathable membrane: Protect buildings from moisture while allowing water vapour to escape. It prevents condensation buildup and maintains a dry environment inside the shed.
- OSB board: Acts as a structural sheathing to strengthen and stabilise the shed walls.
- Tape measure: Ensures materials are cut to the correct size and fit properly.
- Jigsaw: Used for cutting insulation materials and sheathing panels to size.
- Staple gun: Secure insulation materials and other components to the walls and roof.
- Heavy-duty scissors: Designed for cutting thick or tough materials accurately, such as insulation.
Instructions
- Gauge the dimensions of the wall/roof panels using a tape measure.
- Trim the breathable membrane to match the measured dimensions.
- Secure the breathable membrane between the wall/roof panels using a staple gun.
- Lay the fibreglass insulation on top of the membrane.
- Measure and trim the OSB board to fit snugly over each panel.
- Position the OSB board over each panel accurately.
- Use a staple gun to affix the OSB board securely into place.
How to Insulate a Shed on a Budget (Or For Free)
If you don’t want to invest in premium PIR boards or fibreglass wool, you can still vastly improve your shed’s temperature using recycled materials and cheap upgrades.
1. Draft-Proofing (The Cheapest Quick Fix) Before adding internal insulation, sealing gaps is the most cost-effective step you can take.
Caulk & Weatherstripping: Use a caulking gun to run a bead of silicone sealant along the joints where the timber wall panels meet. Apply it around window and door frames to stop driving rain and drafts.
Hardening/Expanding Foam: This works exceptionally well for sealing larger cracks or awkward gaps in the framing.
Stretch Wrap for Windows: If you have single-glazed windows letting in the cold, apply a layer or two of plastic kitchen stretch wrap over the glass. It acts as a rudimentary secondary glazing, stopping cold air from coming through small gaps in the frame.
2. Recycled Insulation Materials
Styrofoam Packaging: You can reuse thick Styrofoam blocks received in shipping boxes. Simply apply the foam to the walls using glue or tape. While it offers only modest thermal resistance compared to proper PIR boards, it takes the edge off the cold.
Cardboard: Flattened shipping boxes have poor thermal conductivity, making them a decent temporary barrier. However, cardboard is prone to water damage and attracts nesting mice. If you use it, ensure the shed is 100% waterproof and lightly dust the boards with boric acid powder to deter pests.
Rugs and Blankets: For a shed floor without a ‘false floor’ setup, laying down a thick rug over a plastic moisture barrier makes the floor feel significantly warmer underfoot.
3. All-Natural Insulation
Thatching: If you live near farmland and want to pack your wall cavities naturally, use water reed or strictly threshed straw (with the grain completely removed). Never use agricultural hay! Hay is full of seeds and will turn your shed walls into an all-you-can-eat buffet for mice and rats.
Sheep’s Wool: Dense bundles of sheep’s wool provide excellent, breathable insulation. If sourcing it locally, ensure it is thoroughly cleaned, kept bone-dry, and treated with borax to repel insects.
Note: The budget-friendly and traditional methods above are perfect for timber outbuildings. However, if you are dealing with condensation on steel panels, you will need to take a different approach. Read our dedicated guide on how to insulate a metal shed.
How Much Insulation Do You Need?
If your shed has thin walls and floors, you may need to insulate everything. Begin with the floor and then move on to the walls, roof, and even doors and windows. Prioritise areas where heat escapes easily, such as the roof, and where cold air seeps in, like the floor.
The insulation required varies depending on the garden shed’s size. Larger models, e.g. a 20×20 unit, will naturally need more insulation than smaller ones.
Tips: Consider using fibreglass wool, bubble wrap, or foam boards for effective insulation. Sealing gaps and cracks with a silicone gun can also further enhance insulation.
Overall, a well-insulated shed keeps things safe, saves energy, and stays comfy year-round.
Round-up
Insulating your garden shed is a wise choice with many advantages. Just follow the steps and use the right materials mentioned here. Make sure to focus on places where heat escapes and cold air gets in. And you’re all set to start insulating!
Investing in a garden shed sale soon? For year-round use, we recommend our pressure treated sheds. Check out our range of options for more via the button below!
What’s next on your reading list: Metal Shed Insulation: What Type of Insulation Is Best?
If you have any further questions, contact us and don’t hesitate to give us a call at 01909 768840.


