Garden shed wall framing can be as simple as installing ready-made panels for a kit, or it might involve building the frame yourself. We’ll cover both methods, so you can follow the general steps in order and get the walls standing straight. Ready?
How to Frame a Shed Kit
Framing a shed kit is straightforward, and it likely comes with an instruction guide. The panels are ready to go, so it’s mostly about lining them up, so the prefabricates frame sections go together. These steps add a little extra clarity you can refer to while you work.
Step 1: Fix the first wall panel
Usually, it is best to start at one of the back corners. Grab your first panel and stand it up on the shed floor.
- Rest the panel so its bottom rail sits flush with the outer edge of the floor.
- Because a single wall will easily tip over, use a temporary brace (like a scrap piece of timber) to prop it up, or have a helper hold it steady.
Crucial tip: Do not fully secure the bottom of the panel to the floor just yet! You need a little bit of wiggle room for the next step.
Step 2: Form the first corner
The next panel attaches to the first to create a self-supporting corner. This is where the frame actually gains its strength.
- Bring in your second panel, stand it on the floor edge, and butt it up against the first panel to form a corner.
- Make sure the edges are perfectly flush, then screw or nail the two wall panels together at the corner joint.
- Place a spirit level against the face and edge of the panels to check that they are completely plumb (standing straight up and down).
- Use a carpenter’s square to check that the inside corner is exactly 90°.
- Once the corner is plumb, square, and completely aligned, you can finally drive screws down through the bottom rails of both panels to secure them tightly to the shed floor.
Move on to the next panel the same way. Keep checking the corners as you go, and make adjustments as necessary.
Step 3: Check door and window openings
Door and window frames usually come pre-built in the kit. But for this step, you’ll need to make some final checks:
- Look along the edges of the frame to see that the opening sits straight.
- Press lightly on the frame. Everything should feel solid.
- Make sure none of the boards shifted during the installation of the panels.
This way, you can tell right away that the openings line up with the rest of the walls.
That’s the shed wall framing done! Onto the next step:
[How to Build a Shed Roof]
Garden Shed Wall Framing from Scratch (DIY Build)
For these steps, you’re starting with raw timber instead of pre-made panels. You’ll be measuring, cutting, and assembling each wall yourself. Fortunately, it can be straightforward, especially if you take it step by step.
Step 1: Measure and cut the wall panels
Every wall starts with a bottom and top plate. These are the horizontal pieces that the studs will sit between. The number one rule is to get them the right length.
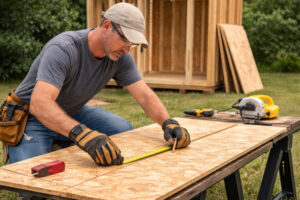
- Measure the shed base and cut the plates to match. Double-check the length so everything fits.
- Lay the plates flat on the ground or a work surface. This is where you’ll assemble the studs.
- Check the edges for warps or uneven boards before attaching the studs.
Plates done? Great, let’s get the stud in next.
Step 2: Mark the stud spacing
This part sets up the wall.
- Take the top and bottom plates and mark where each stud will go. Most walls use 400mm or 600mm spacing, but follow your plan.
- Line up the marks on both plates to avoid the studs from leaning or being uneven.
- Mark any door or window openings so you’d know where to skip a stud or shift one.
Step 3: Assemble the standard wall panels
Start by building your windowless, standard wall sections. Lay your cut top and bottom plates flat on the ground or a level work surface, then start placing your regular studs between them based on the marks you made.
- Drive nails or structural screws through the top and bottom plates directly into the ends of each stud.
- Use a carpenter’s square on the outer corners of the frame to ensure the whole panel is sitting perfectly at 90°.
- Add any required horizontal noggins (braces) between the studs for extra rigidity.
Once the solid panel is squared and secured, set it aside.
Step 4: Frame door and window openings
Not all wall sections are solid. If the panel you are building on the ground includes a door or window, the framing needs extra support to carry the weight of the roof over the gap. Build these specialized panels just like the standard ones, but incorporate these crucial components:
- Headers: Install a thick, sturdy header horizontally right across the top of the opening.
- Trimmers (Jack Studs): Fit shorter vertical studs tightly underneath the header on both sides of the opening. These will bear the weight of the header.
- Sills (for windows): If framing a window, add a horizontal sill plate at the bottom of the opening, supported by even shorter studs beneath it.
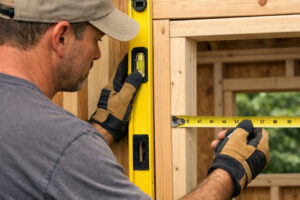
- Check the opening: Measure the internal dimensions of the opening diagonally both ways to ensure it is perfectly square, otherwise your windows and doors won’t fit later!
With your solid panels and your window/door panels fully assembled on the ground, you are finally ready to start standing them up.
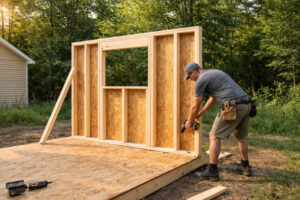
Step 5: Lift and fix the wall frame
Now that the wall is built, it’s time to get it upright. This part can feel a little tricky at first, but it’s doable with a second pair of hands.
- Lift the wall carefully onto the shed base and line up the bottom plate with the edges of the floor.
- Use temporary braces to hold the wall steady while you work on the next one.
- Secure the bottom plate with nails or screws so it won’t move.
There’s a satisfying moment when the wall finally stands on its own, isn’t there?
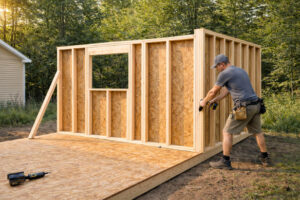
Step 6: Erect and connect the remaining walls
The rest of your pre-assembled walls go up the exact same way, one by one. Take it slow, as connecting the corners is where the structure really gains its strength and stability.
- Lift the next wall panel into place, ensuring the bottom plate sits flush with the edge of the floor.
- Butt the edge of the new wall against the standing wall and drive screws or nails through the end studs to securely lock the corner together.
- Use a spirit level on the face and edges of the studs to ensure the newly formed corner is perfectly plumb (vertical), and use a carpenter’s square to check that the inside angle is exactly 90°.
- Once the corner is plumb and square, secure the bottom plates down into the floor.
- Continue this process, using temporary braces as needed, until all four walls are up and connected.
Straight corners and aligned walls make the next steps, like the roof, much easier. By the time the last wall is tied in, you’ll have a frame that’s solid, level, and ready for the finishing touches.
Round-up
Look at that, your walls are up! Feels solid, doesn’t it? You’ve got corners that line up, studs in place, and openings ready for doors and windows.
These are just general steps. Your shed might be a little different, so tweak as needed. Either way, you’ve done the heavy lifting, and the frame is standing tall.
Skip the guesswork! Grab a shed kit that’s ready to go and get your walls standing in no time.