
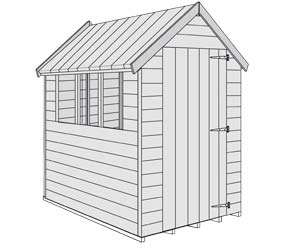
Keep scrolling to find out how to build a garden shed.
Firstly we recommend reading the article named building a shed base. Once a level shed foundation is laid (it is imperative to be level to ensure that the shed can be assembled correctly), the shed can be built in little time following the provided step by step instructions. We would recommend a general fixing kit to include a hammer, powered screwdriver, etc ready to assemble this building. BillyOh sheds come complete with a full fixing kit including all screws, nails, door fixings, etc sufficient to assemble the shed.
A helpful hint when planning how to build a shed is that if the space is available is to lay out all the panels in the corresponding places around your work area, ready to just be lifted and secured in place.

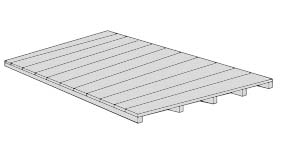
Lay Out The Shed Floor
If the shed floor section is pre-assembled this is a simple case of laying this down on the level base. Solid Sheet sheds may require additional assembly which will all be broken down in any provided instructions. Larger Sheds such as workshops, garages, and even log cabins etc may use multiple floor sections which just need fixing together.

Attaching The Back And Side Shed Panels
The back shed panel (Back Gable) is then fixed to one of the shed side panels using nails. Following this, the other small shed side panel is then nailed to the shed back panel (Back Gable). Do not nail the shed to the floor at this stage as it restricts the movement in the building when attaching the roof panel.
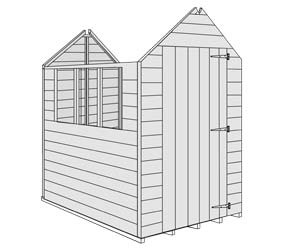
Attaching The Shed Front Panel
The shed front panel (Front Gable) is then attached to two shed side panels.
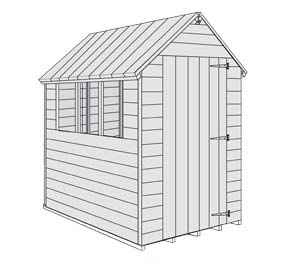
Shed Roof Panels
The shed roof panels are then nailed into place ensuring that the shed sits square. Now that the shed roof is fitted, the remaining shed walls can be nailed to the floor. For an apex roof shed there will be two roof panels; for a pent shed, just one.
The Roof Felt
The wooden shed roof trusses are then finished by tacking the roof felt in place and attaching any final strips. The larger the shed, the more trusses.
Then you can finish off the interior of your shed with any home decorating, or by installing hooks and shelving for storage purposes.
It is highly recommended to ensure that the shed is treated on an annual basis with a quality wood preserver. Please see the product options for our range of shed treatments or some of our best-selling sheds.